Showing posts with label tempera paint. Show all posts

Tuesday, December 16, 2014

2nd Grade: Fairy Tale Self-Portraits

And here's the second self-portrait project for the year!  The first Common Core listening and learning strand in 2nd grade is Fairy Tales and Tall Tales.  Last year, we created a collage of Beast's Castle from Beauty and the Beast.  This year I decided to take the self-portrait approach and have students paint themselves as kings, queens, princes, and princesses from a fairy tale.

This project took a total of three days.  On the first day, students used a mirror to draw their portrait in pencil.  On the first day and second day, they used a skinny brush to paint their outlines with black paint.  The second and third day was devoted to painting their portraits.  I told students to paint their backgrounds a single color, for the sake of time, but you'll notice that a few students had enough time to get a little more creative with their backgrounds.  :)  This project proved to be a great one for teaching students how to make smart choices with the type of paint brush they pick for a painting.


Tuesday, February 4, 2014

Kindergarten: Secondary Shapes

The first project I did with kindergarten as I came back from my maternity leave was my secondary shape project.  This one is a staple that I do every year.  This year it didn't change much from last year, other than the fact that I found purple and green metallic paper for the students to use with the gold instead of plain construction paper.

So, here is the gist of what happens and why I like to do this project every year.  This does align with the kindergarten Common Core Math Standards...specifically with the geometry standard of knowing shapes.  This is usually a follow-up lesson to my primary lines project where students are introduced to tempera paint.  This year my substitute did not do the primary lines lesson to teach primary colors...instead she chose to do Mondrian collages instead (which I have yet to photograph and share with you), so this project introduced my kinders to painting with tempera paint.

The first day, we reviewed shapes.  I had the students draw a square, triangle, rectangle and circle on the back of their tag board while I got the paint palettes ready for them.  Next, I demonstrated how to dip just the tip of the brush into the paint before applying it to the paper.  We talked about rinsing the brush off in between colors, how to WIPE the brush on the edge of the water bucket instead of banging it and causing splatter, etc. etc.  I then tell the students that I want them to paint a variety of shapes, including big, small and medium shapes.  While I circulate the room, I tell students to create a good composition by filling the entire paper with different shapes and spreading out the colors they use.

On the second day, I gave each student three sheets of metallic paper.  We review scissor safety and I reviewed how to glue with "just a dot, not a lot" around the edges of each shape.  I have my little kinders glue one shape at a time, holding each shape down with their hand and counting to 10 (great for practicing counting too!).  Again, as I circulate, I encourage students to be creative with their placement of the paper and remind them of using up the entire piece of paper.

I have lots more to share with you...both from my maternity leave and what has been accomplished since I've been back.  This last Friday was the end of our 2nd marking period and I was FINALLY able to catch up on grading and photographing most of the artwork that has been completed so hopefully there will be plenty of more posts this week!

Saturday, November 2, 2013

1st Grade Day of the Dead Skeletons

Have I mentioned that my 1st graders are a VERY difficult group this year?  That being said, I had meant for this project to be completed last week so they could be hanging before November 1st and 2nd, however that didn't happen.  We spent the majority of two class periods before this with our heads down, practicing being quiet.  I have 24 seats in my classroom and one first grade class with 24, and one with 25 students!  

Either way, the first class has finished the project and the second will finish theirs on Monday this up-coming week.  This project came directly from Pinterest.  What is great is that the timing of Dia de los Muertos lined up perfectly with the 1st grade NYS Common Core Listening and Learning Strand about the human body.  In that strand, the students learn about the muscular system, the nervous system, and the skeletal system.

I brought down this model skeleton from the health room, which the students loved!  He was, however, covered up with a sheet most of the time (which sort of made him more creepy...but otherwise he was too much of a distraction to all of the other classes!).  

I had intended that this project would only take us 1 1/2 days to complete...but it actually ended up taking 2 1/2 days due to student behavior.  After we finished up our pumpkin patch drawings, we took 10 minutes at the end of class to view a power point about the Day of the Dead (that was the half day).  On the second day, I had intended that the students would quickly review the primary and secondary colors (since I had covered them so extensively in kindergarten), and take 10 minutes to paint their cardboard.  I was planning on going over the skeletal system with them and then building the skeletons on the cardboard that day.  Unfortunately, that didn't happen.  It took us an ENTIRE period to paint a little 5"x7" piece of cardboard and to clean up.  

So, I ended up having to take one day to paint the background and one day to make the skeletons.  Since I'm getting so close to my maternity leave, I wanted to make sure these got done so they could be graded by our 10 week marking period next week.  I had intended to take one more day to make the flowers but either way, we were able to make the skeletons and flowers in one class period.

We also didn't get a chance to mod podge these like in the original post from Pinterest, so I'll probably just spray them with some glossy fixative spray before I hang them. 


These are the seven elements on my rubric for this project:
1.       Skeleton Bones (shows all major bones: skull, spine, ribs, pelvis, collar bone, arms, legs & joints)
2.       Background (painted background one secondary color using two primaries)
3.       Marigolds (built marigolds to fill in the negative space around skeleton)
4.       Used Creativity (positioned skeleton in an interesting way)
5.       Used Good Craftsmanship (Neatly glued all pieces to cardboard.)
6.       Has a Good Composition (Used entire piece of cardboard.)
7.       Used Time Wisely (Didn’t rush artwork; didn’t waste time)

Wednesday, October 9, 2013

6th Grade: Prehistoric Cave Art

Sixth graders have finished their cave walls!  Last year I didn't get to do a cave art project with the students because they breezed through the unit in social studies and started right in on the Ancient Egyptians.  This year, I made sure I started this early, so as we have finished this up in art class, the students are just starting cave art in social studies...perfect timing!

Tomorrow is parent-teacher conference night so we managed to get this done just in time.  Unfortunately, I couldn't get the paper into those nice display strips I bought last year through the Parent's Association, but they were still useful to tape up the cave walls on.  (The crinkled paper just wouldn't slide in the strips!)

This project took us a total of about 2 1/2 class periods to complete.  On the first day, which was essentially the half day, I showed my power point about prehistoric art and we did the virtual tour of Lascaux Cave on the smartboard.

On the second day, we unrolled and took a huge sheet of brown butcher paper outside on the sidewalk.  I had the students all line up on both sides and in pairs.  Then then slowly crinkled and unfolded the paper to give it physical texture.  Next, we took natural colored chalk that I have and rubbed it all over the wrinkled paper.  Using paper towels, we wiped it to blend all the colors together.  One class did a better job blending the colors than the other, but then the other class did a better job (in my opinion) of filling their cave wall with large cave paintings! 

On the third day, we took about 15 minutes to talk about and mix our egg yolk tempera.  I gave each table four cups.  One had pigment in it, two were empty, and one had the egg yolk.  I sent one person to the sinks to fill one empty cup and get a paint brush for mixing.  In the other empty cup, I asked them to fill it about 2/3 full with the powdered pigment I gave their table.  Then, they had to slowly add water to create a paste, about the consistency of tooth paste.  Lastly, I had them add the paste mixture to the egg yolk, mix and shake.

I added these signs on the wall across from the cave walls...

My first year of teaching, I actually set up a real "cave" for the cave art we did.  That year, I had the students rip the edges and then crinkle Manila tag board.  We painted them with tempera and then quickly rinsed the tempera off the paper before it dried.  This created a similar effect to the chalk.  That year, we didn't make our own paint.  Then, I also had the students use chalk and paint on rocks to create a painting on an actual rock.  I set up my easy-up tent in the media center (I only put it up about half way) at our school and then attached blankets all the way around.  I pinned up all of the cave art inside on the blankets, laid the rocks down at the bottom along the edge of the blankets, and then set a lantern on the outside so people could crawl in like a real cave to view the artwork.  It was a huge success, but A LOT of work!  I set it up the next year for our art show as well (if you check out the 2012 Art Show page, you can see two pictures that sort of show the cave.  One shows a "cave man" inside the cave (it's a dark photo) and the other shows our other "cave man" standing outside of it!)

Wednesday, May 1, 2013

Want to try different paint supplies...do you have any feedback? (UPDATED!)

So it's going to be official...I will be teaching K-12 art next year, with my priority at the 7th Grade and Studio Art classes, and then filling in electives and the elementary grades.  More than likely, I will end up having the elementary grades once a cycle.  I have it on a good note that if I can increase the numbers of students in electives classes, that the district might have to hire another art teacher in the future (which would be good news!).  Unfortunately, the reason we are going down to one art teacher is because students aren't signing up for the electives...2-3 students per electives isn't enough.  I created a list of electives I'd want to teach, including possible projects, and the counselor is going to go back to the high school students to see who would sign up for them (I'm thinking a Ceramics class, Cartooning, Advertising & Design, Fashion Design...)

Anyways, the thing I'm starting to fret about is supplies and the condition of the other art room I will be using (yes, I will have two art rooms I'm in charge of).  I have a good idea of the supplies that are in the high school art room, as well as the [not so good] condition of a lot of the stuff, including paint.  I'll still be able to order supplies with the remaining budget (however due to the circumstances at our district, we need to do a 10% cut in supplies...not that big of a deal for me...)

Here's what I'm asking you...I want to make some changes in the high school room as to what supplies are used and such.  Depending on my electives, I'll have a class of 19 in Studio, and two classes of approximately 16-18 for 7th grade.  Studio will probably run the entire year, and 7th grade is every day for half a year.  Below are some supplies that I've been thinking of switching to in the past and I'd like your take on how they work if you've used them before!


6-Color Pump Kit, Gallons1. Blick Student Grade Tempera with Pumps:  A lot of the paint in the high school end is chunky, smelly, separated and from the 80's.  The previous teacher didn't do so much with painting, she was more of a sculpture teacher.  I generally use Crayola in the elementary end, but I want to try out the gallon size jugs of tempera for the high school.  I plan on buying paint palettes with the lids for conserving paint when we do paint projects (each student will get their own palette for paint, with a lid).  How do these pumps work?  do they tend to clog easily?  Would you suggest a different brand of tempera in the gallon size jugs?

UPDATED:  How about the upside-down dispensers for tempera???  Has anyone used these before?


I'm thinking that I could buy two sets of these gallon jugs, maybe an extra white, and be set for the entire school year, if not longer...as long as I can teach them to conserve paint properly and my idea to use the paint palettes with lids works!

Chromacryl Students' Acrylic2. Chromacryl Acrylics, 1/2 gallon with pumps:  I generally prefer to paint with acrylics (I'll be staying away from oil paint for now...I've never been officially trained or educated in oil paints.) so I want to go with the 1/2 gallons of Chromacryl.  I use this brand in the Elementary, but I usually go with the pint size.  Again, how do the pumps work with the acrylic?  Do they clog up a lot?  Are the pumps a waste of money?  Does anyone use a different acrylic paint that can be bought in bulk that is of the same quality at a cheaper price?

On the Elementary end, I've been using the round palettes and lids to hold the acrylic paint during an entire project and it really works well.  I've wasted a lot less acrylic doing it this way, so I plan to continue that in the high school.


In the next week or two I'll be trying to do an inventory of the other art room in my spare time, so I may have more supply questions to add!

Thursday, January 31, 2013

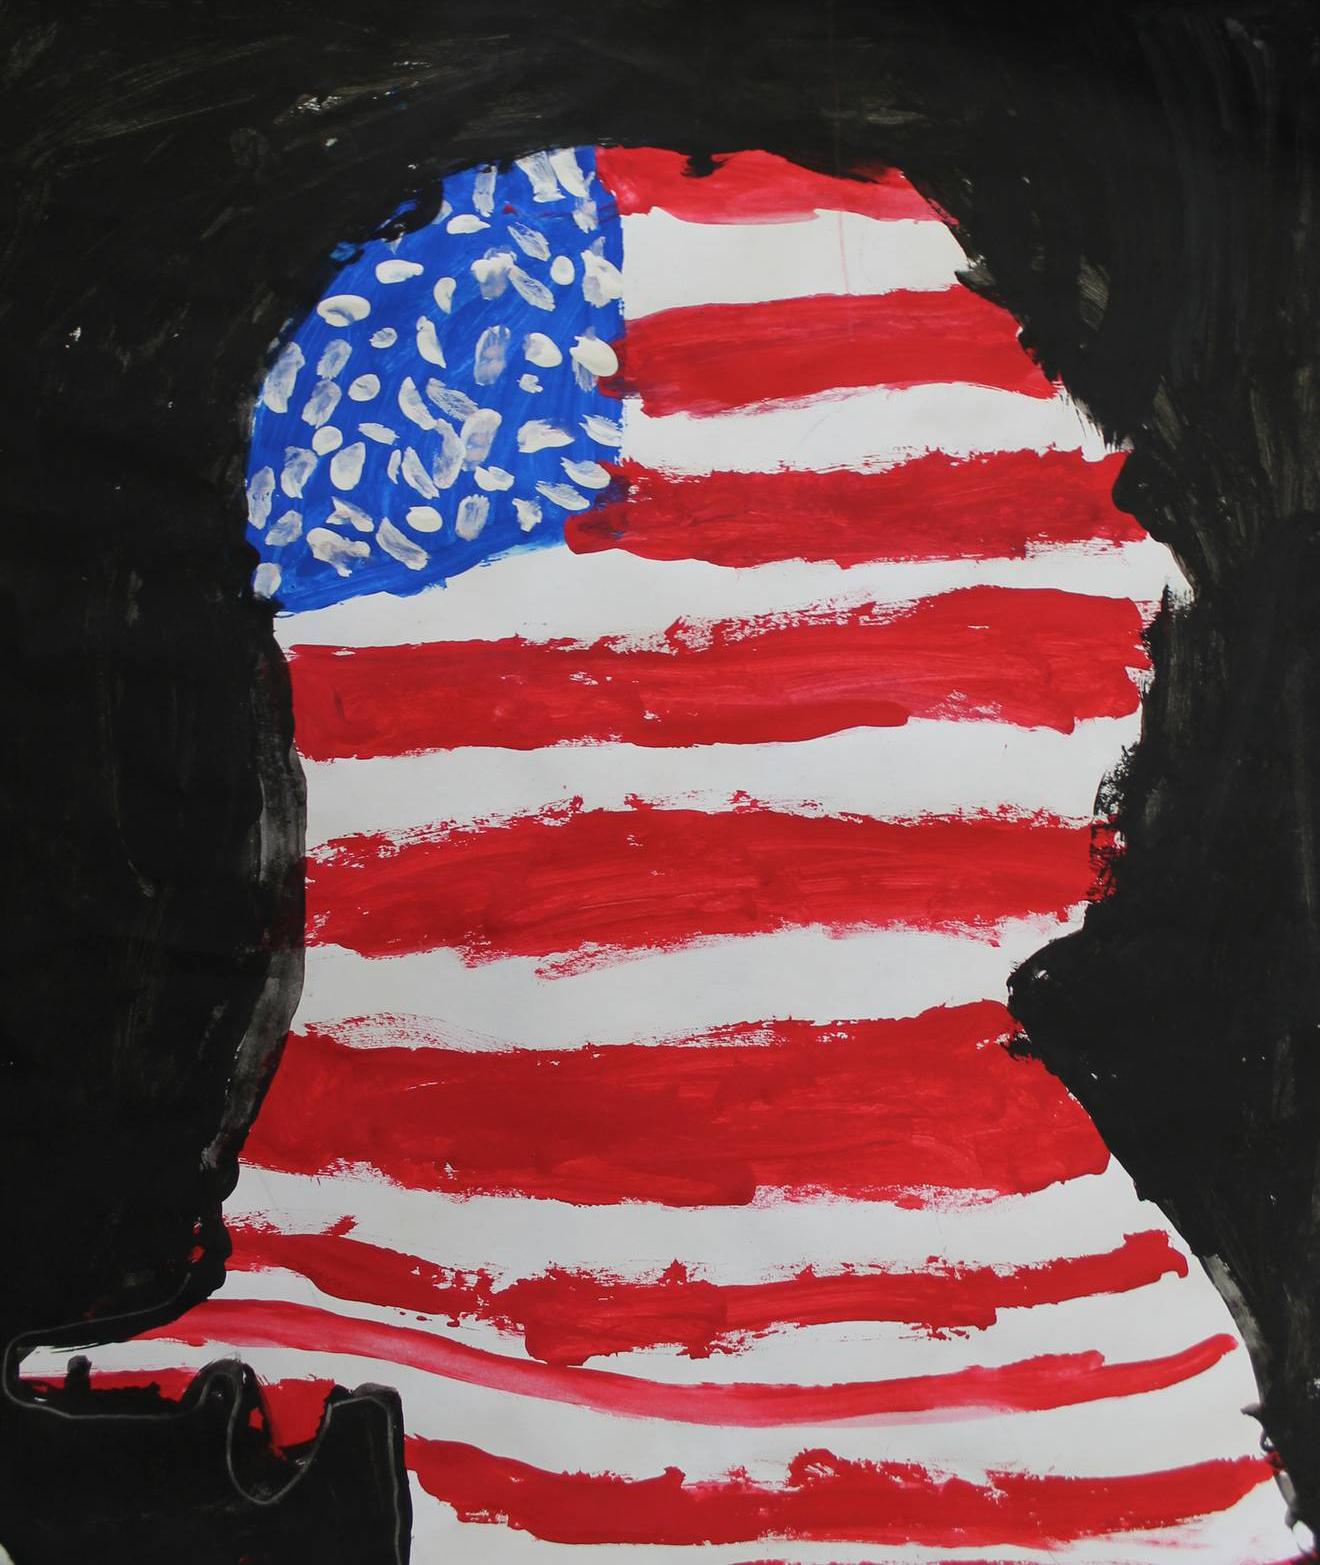
Flag Silhouettes

My second graders have started finishing up their final project in my Jasper Johns unit.  I only have three more students in class A who need to finish up, and then hopefully, class B will finish tomorrow!

For the second part of this unit, we reviewed what the American flag looked like and we talked about the symbolism behind the flag.  I showed students what the flag used to look like and we discussed the changes it went through.

Initially for this project, I was going to have the students trace their silhouettes with a partner, but they weren't being very successful.  I think that was in part due to the lack of flat wall space that I have available in my room for everyone to work at once.  I ended up calling students up, one at a time, to my smart board and I used the light from my projector to trace their shadows on their paper.  

I had the students paint the flag inside their silhouette, and then we painted the outside all black.  I took this as an opportunity to review how to paint with tempera paint.  We talked a little bit about craftsmanship and how to paint without making the solid black background streaky.  Some students grasped this concept very well, others not so much, but they all still look great!

For the final part of this project, I asked students to write a 5-sentence paragraph about the flag.  As a group, we brainstormed words about the flag and I wrote them on the smart board so that students wouldn't spell words wrong.  Unfortunately, I don't feel like I can devote a lot of classes towards the writing portion...we spent one full class period, and then most of today's class writing our paragraphs.  Some students did great on their own while others needed one-on-one help.  Eventually, I stopped worrying so much about spelling and punctuation and focused more on the content of their sentences.  I feel like this is a great way to incorporate the Common Core.  The shifts for the Common Core are all about getting kids to do more reading and writing, especially from factual information.  This helped the students reflect upon what they learned about the flag, recall some facts, and discuss symbolism.

Here are some of the finished products!  You can check out the rest of their silhouettes and paragraphs on Artsonia.  They'll be up in the next few days!