I am SOOOO excited to share these! They have taken FOREVER to complete, mainly due to the fact that my 7th graders were very rude and mean to my substitute while I was out for a week, and thus had to face the consequences of a weeks worth of writing assignments. Needless to say, it appears that most of them learned their lesson and for the most part, they have been relatively sane since then!
This was the final project in my sculpture unit for 7th grade. It has been a big hit and has even made my Studio class jealous!
After we did the wire sculptures, I broke the students up into groups and had them research a sculpture artists. They had three class periods to research and compile notes to share with the rest of the class. They then had two days to present their findings. Once that research project was complete and students had been quizzed on the artists (which they actually did very well on!), we started this George Segal inspired project.
It took three art periods for the students to cast each other's hands in the plaster. I used Plastkraft plaster strips...which are very similar to the
Blick version here on their website. (I had almost 10 boxes of the Plastkraft stuff when I started teaching...I think it was ordered through Boces and haven't been able to find a link to the exact stuff I'm using.) We took one entire art period to cut up a box of plaster into three different sized strips...large ones to cover their arms, medium ones for the wrist and hand, and small strips to wrap around the fingers. Next, they were split into groups of three. Two students covered another's arm and hand. As a safety precaution and to prevent plaster burns, the model was required to wear a plastic glove and then wrapped their arm and wrist in saran wrap.
Students had 15 minutes to cover their model.
The model had to let the plaster set for 15 minutes.
While the plaster set, the others started cleaning tables.
In the last 10 minutes of class, I went around to the models and cut a slit in their casts so that they could spread the arm and slide themselves out.
The models then patched up the cut with more plaster and then were on their way.
***A word of advice...only let students do two layers of plaster on the model's arm...any more and it is nearly impossible to cut through the plaster to get the cast off! I actually had to use a small saw on one student because it was SO thick!
Once all the casts were off, I asked the students to look at their casts and to figure out what the shape of it reminded them of. They then had to paint their cast to turn it into something else. In the sculpture packet, which
can be found on the SmartTeacher website here, I included a planning page where students had to answer a series of questions about what colors they were going to use to get the planning juices flowing. (The packet also includes the rubric I used to grade the project...it's located on the last page.)
Before we started painting, I had them cover the plaster casts in gesso. That took one period. Then, I had them paint a base color on their hand casts...that took another period. Finally, students took on average, another three periods to paint their casts. Some got really creative and added to their casts, while others took a very non-creative, easy way out. Usually I don't share the projects that I'm a little disappointed in, but I'm going to share all of the finished casts I have received so far so that you can see the range of what I received. For the most part, I am extremely happy with about 80% of the projects. Students who normally struggle in my class really enjoyed this project and stepped up big time!
Unfortunately, all of the photos I took of the in-between processes (creating the hand casts, priming them, etc.) magically disappeared off of my phone. I had some pretty cool shots of the students with their hands all in casts and I've lost them! :(
The Galaxy
A snail!
Spiderman
A storm...
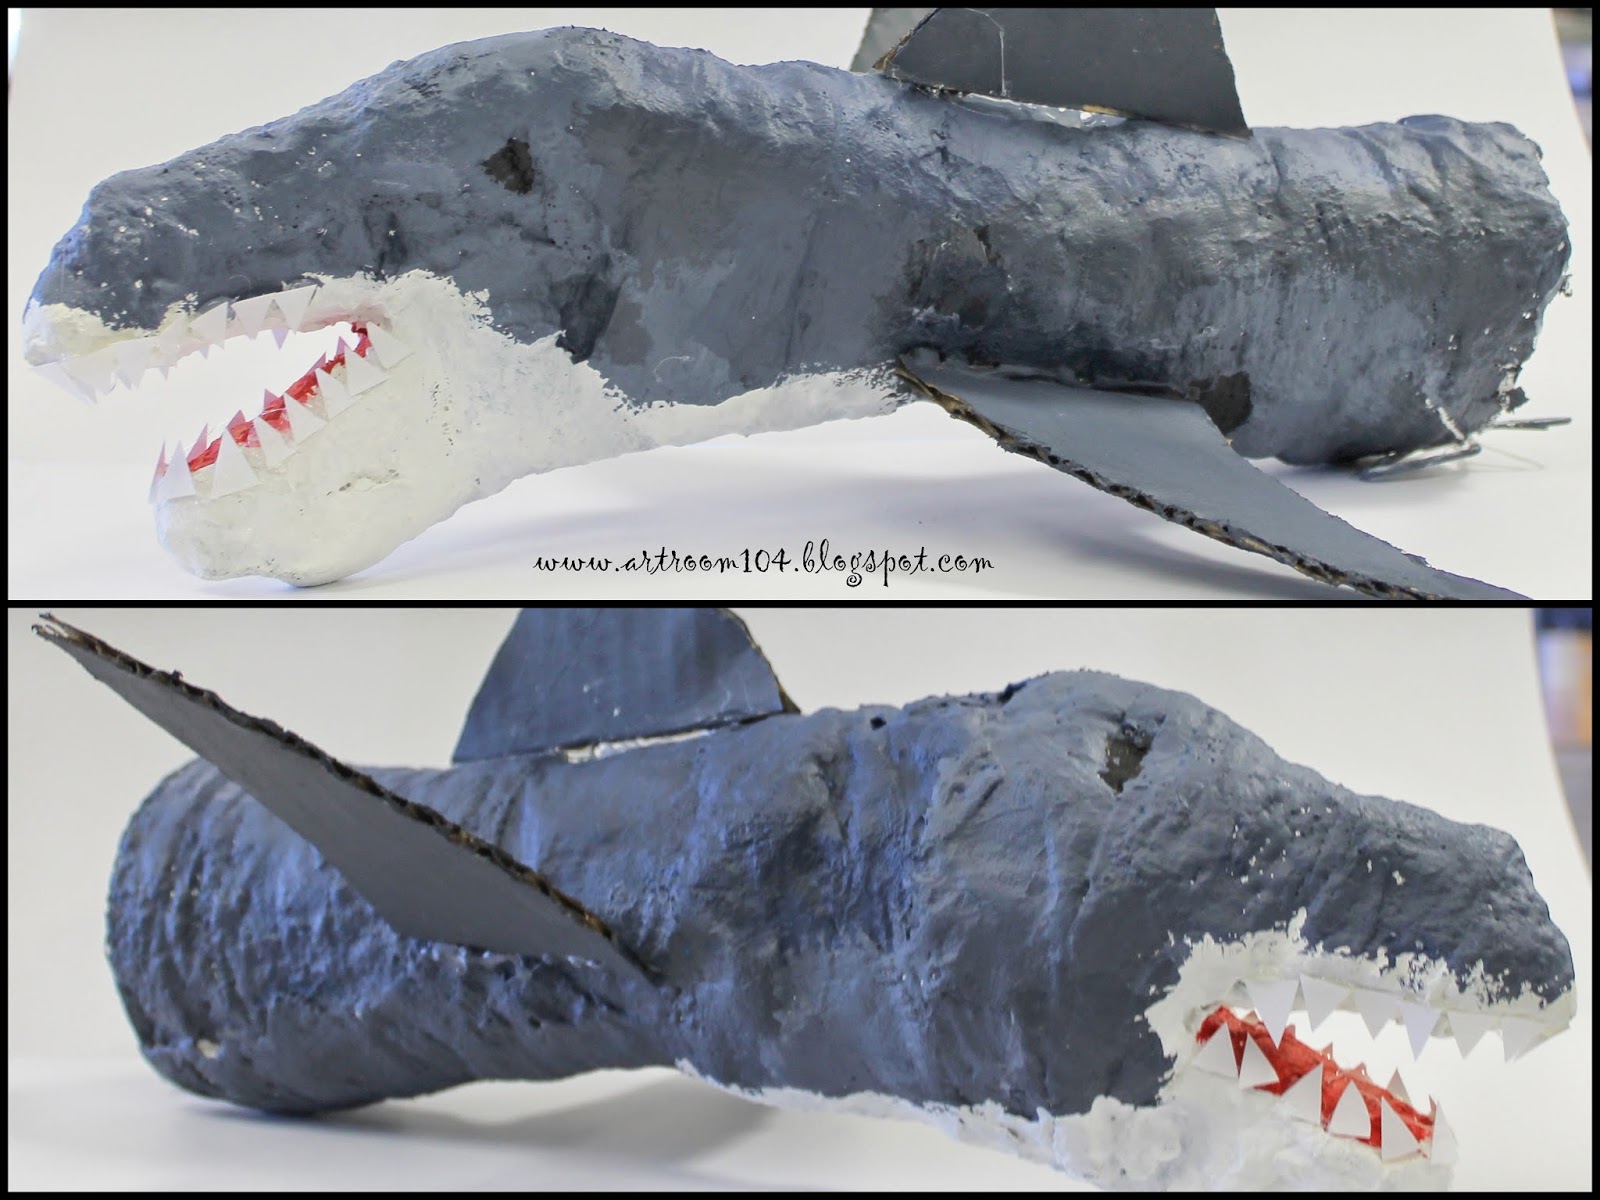
Shark!!! I LOVED this one! This is one of those struggling students who did awesome on this project!
I was a little skeptical when this person started painting clouds and rainbows...not my cup of tea, but when she started adding the quotes, I thought it worked a little better. The only thing that would have made this better was if the quotes were her own!
A platypus...though I thought it was going to be a mallard duck...turns out this is from a cartoon...which I always tell them they aren't allowed to copy from...tsk tsk tsk! (Especially Sponge Bob...yuck!)
Basketball player, a turkey and a fox. On the fox, we used fishing line to make the whiskers.
This one could have been a lot more successful...she started without a plan and was going to just cover the whole thing in cheesy yellow stars. I said, "What about a night vs. day?" This is as far as she took it...
A tree, flower, house, and the last one on the top row was one I was not happy with...the student didn't have a plan and didn't execute what he did very well.
The bottom row starts out with a locker, an obvious hand, a snake in the grass and an Easter egg design. The snake one isn't bad, but the rest obviously had no plan and didn't care very much about their execution of the project.
A bunny and a tree.
The middle one here is interesting in terms of the colors and design...it's from a student who plays a lot of video games. The rest, again, had no plan. The top left is supposed to be camouflage....a decision made on the last day when the student painted over everything she had done already after spending every period chatting and gossiping...ooooooh 7th graders...