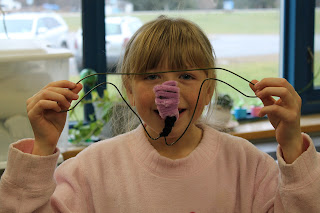
So today, I invited Mrs. Deleel over to make those wire sculptures I learned to make at the NYSATA conference! The kids LOVED them! Now, normally I would love to do this project by introducing Alexander Calder, talk about different breeds of dogs and cats, etc. etc., but I figured this would be a nice filler and we could send these sculptures to the humane society to decorate their building with! So, here goes...
Step 1: Squeeze the hook on the hanger so that it creates a little loop. This will become the nose.
Step 2: Bend the entire top part of the hanger around so that it is on the inside of the hanger. Don't just try to bend the loop you made or the twisted part. You have to actually bend the entire top part inward. This is probably the most tricky part.
Step 3: Bend the corners of the hanger so that they aren't corners anymore. This makes it easier to bend the ears into different positions. If you just bend the ears down/up from the way the hanger is bent, you'll have a really big space between the ears and a very short space between the mouth and ears.
Step 4: Shape your head as wanted! I call this one the bull dog! ;)
Step 5: Wind pipe cleaners around the wire, starting with the nose. You can be really creative at this point...add a long tongue from the bottom (pictures next week after the kids complete this!)...make whiskers...use a pipe cleaners and buttons to make eyes...
Here's Mrs. Deleel's dog! Despite claiming she lacks in the creativity department, she got pretty creative I think! A yellow lab with a bow!
At the conference, some teachers were wrapping the entire ear from one side to the other with pipe cleaners to make the pink insides...
I'm definitely going to do this again, but more in depth. Maybe pair it with Blue Dog...the presenters at the conference did this with 1st graders, but I don't think I could imagine doing this with my 1st graders! About 1/3 of the kids had a hard enough time bending the hangers. I think you could definitely do this with younger kids if you had the white or colored wire hangers...the ones that are more pliable and easily bent.


Wow! These are fabulous! I have done wire sculpture with my students using sculpture wire (and wrote about it on my blog). I thought hangers were too difficult to bend. Your lesson requires little or no prep and the dogs are charming. Thanks for posting!
ReplyDeleteRina at www.k6art.com
Great lesson! talk about problem solving!
ReplyDeleteThanks. I was not able to make it to that workshop. I did one of these this morning while waiting for my dryer to stop. (Ice Day!) Awesome and easy. My Alternative Kids will love this!
ReplyDelete