Showing posts with label supply bins. Show all posts

Tuesday, September 22, 2015

Back to school...three weeks late!!!

I'm still here!!! I promise!!!  The start of this year has been extremely hectic and I'm only now getting my feet under me!!  We are in the midst of a building project and I was unable to access either of my classrooms ALL SUMMER!!  We also didn't have power, lights or electricity for our first day back of staff development!!  It was horrible for my organized "OCD" to have to do everything on the first two days of staff development.  Not to mention, I wasn't able to get much lesson planning done at home with an almost two-year-old toddler!

Ironically, at the end of the last school year, I tore EVERYTHING down off of my walls in both rooms.  I guess I anticipated that the construction project would be a bit more organized...I guessed wrong. ;)  None the less, my No-No Board is gone this year and it has been replaced with my rules (in the elementary room).  I kind of stole some of the wording from Mr. E. :-D


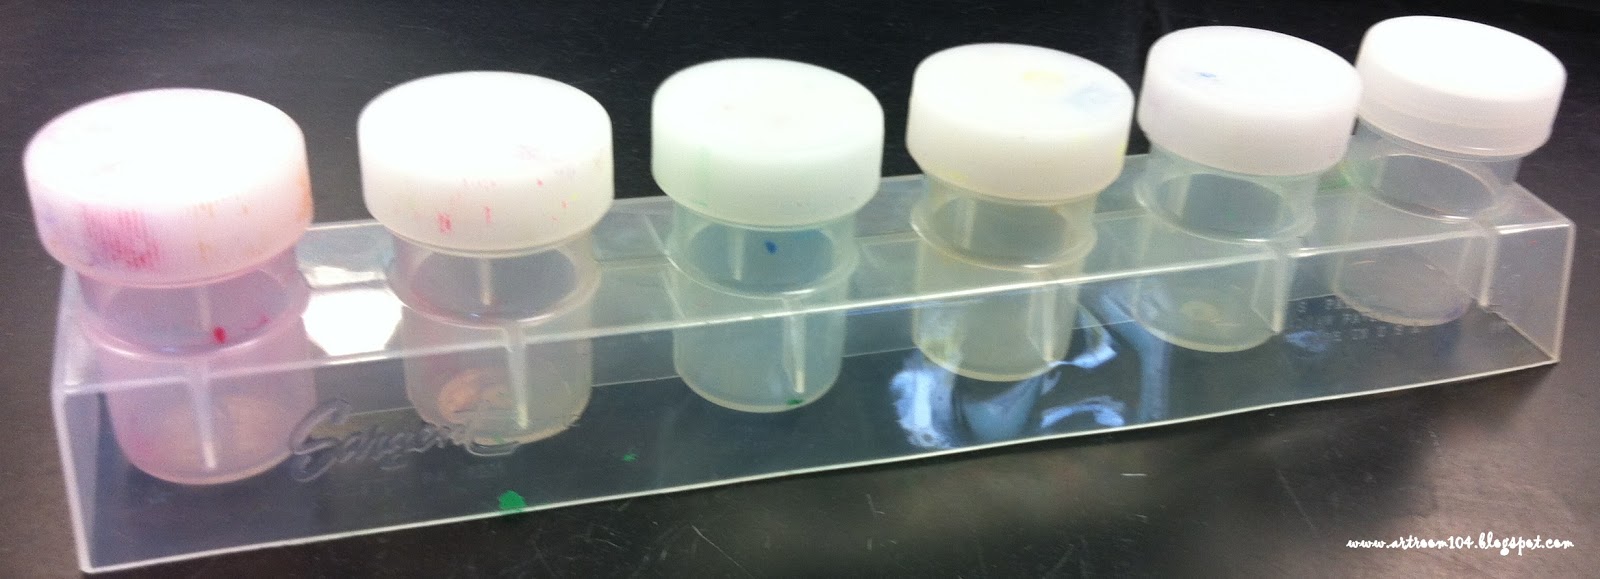
My supply bin organization looks a bit differently this year.  I found these cute, mini-supply totes at Target in the dollar section, plus some pencil pails and rainbow pails.  I decided to use smaller bins to hold the supplies so that students don't have everything at their tables all at once.  In particular, I was thinking of those 1st graders and Kindergartners who tend to be distracted by the markers and want to use them, even though they aren't supposed to be.  I also made some simple, laminated place mats and taped them down to the counters, and I included a picture on the window for how the supplies should look like when they are returned.

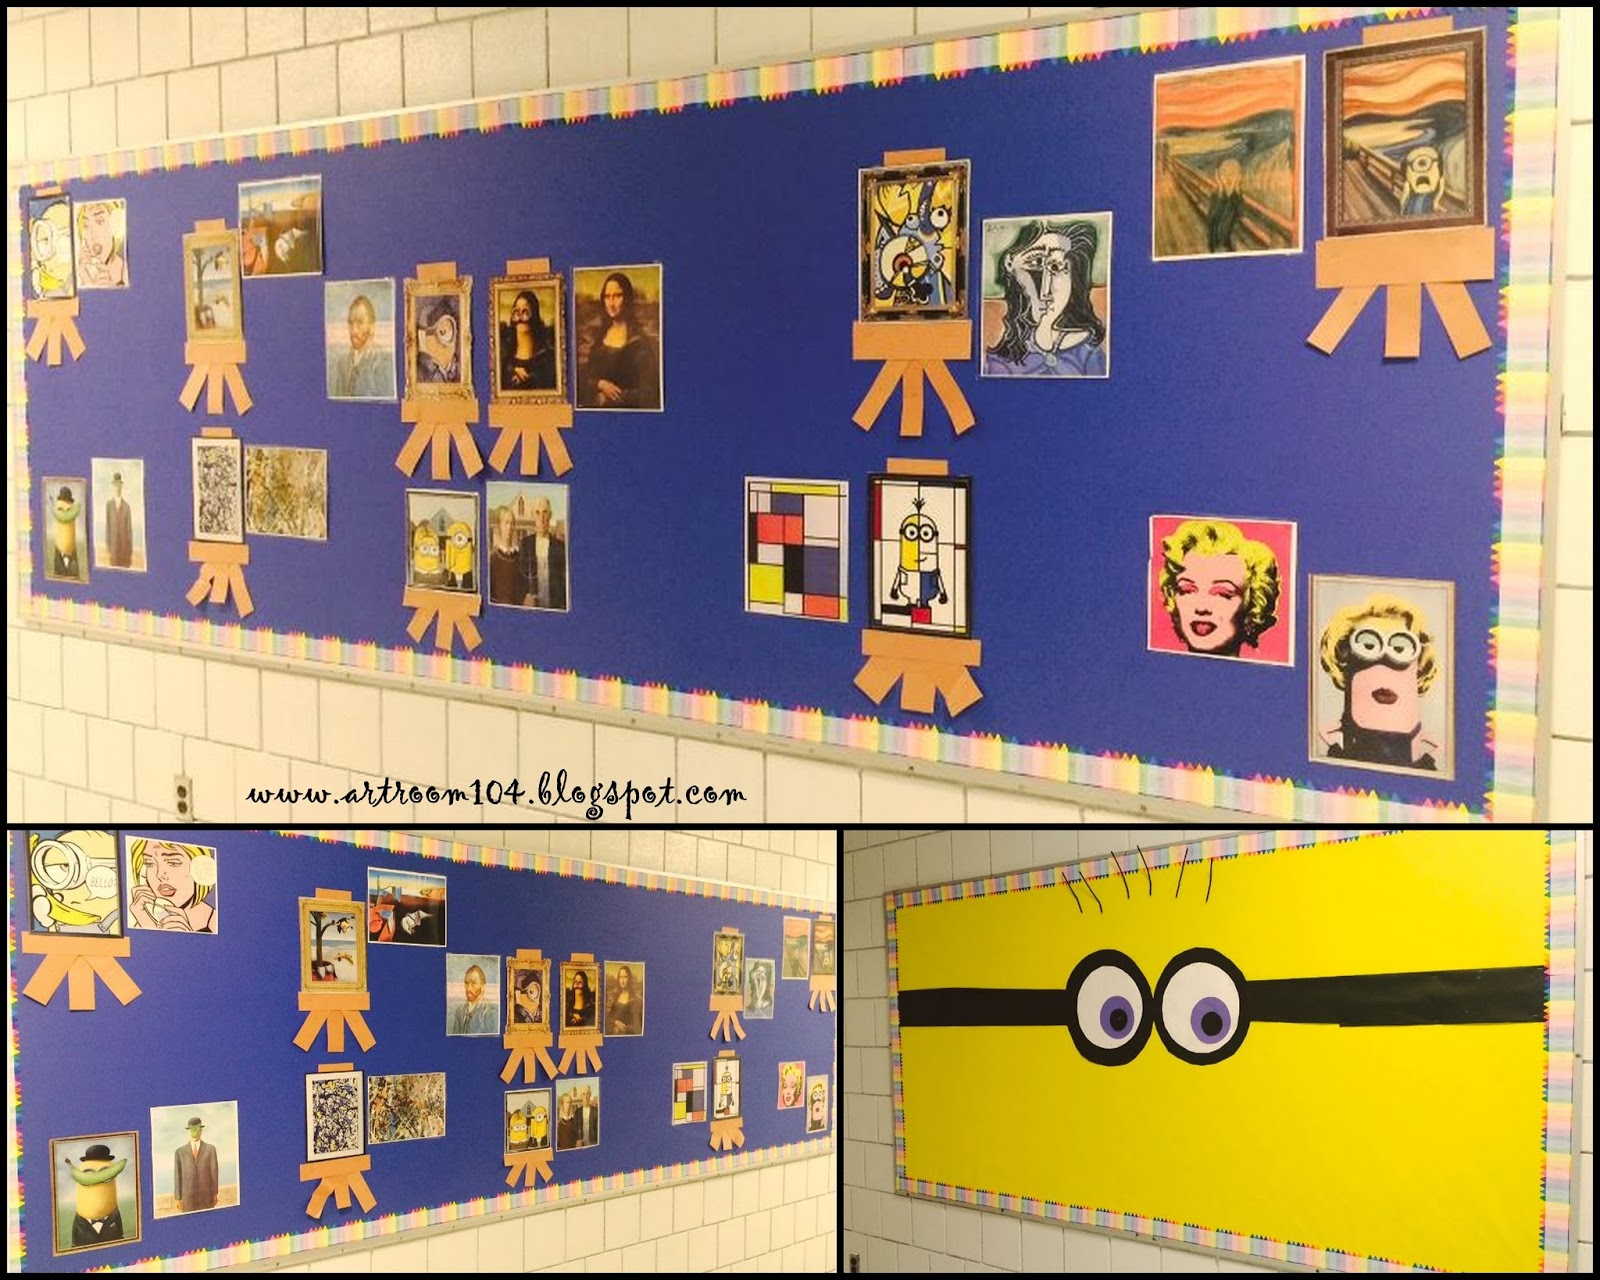
My go-to bulletin boards for the first two weeks of school are minions.  Yup, straight from the art teacher's Facebook group.  The kids loved it!

For K-2, we traced, colored and cut out our hand prints for the first day of art class and I created this bulletin board.  We, of course, returned to school BEFORE Labor Day this year, so we had school on Thursday and Friday, no school on Monday, and then resumed classes on Tuesday.  Essentially, my first week and a half was just rules and hand prints with the younger students and we have only now really started to dive into our projects.

Last year I shared a bit about using sketchbooks in 6th grade, as well as my high school classes, and this year I'm increasing that usage a lot more.  We are using sketchbooks in grades 3-6, as well as in Art 7, Studio Art, my Printmaking elective and my Ceramics elective.  All is going well so far!

Speaking of my classes, I'd like to give you a glance at my ridiculous schedule this year.  I sort of did this to myself a bit this year by taking on an extra class.  My union contract states we teach for 6 periods, have a prep, a lunch, and a duty.  Well, at the end of the year last year, things got changed around and classes shortened a bit to add a 9th period into the schedule to create a common study hall time in the high school.  

I was beginning to have such high requests for electives that I wanted to offer two.  (Secretly, I'm hoping that they will be willing to hire a part-time, elementary teacher for next year to free me up for more high school classes...we shall see how that pans out!)  My numbers have increased drastically in the high school classes since I started teaching them two years ago, so fingers crossed!!
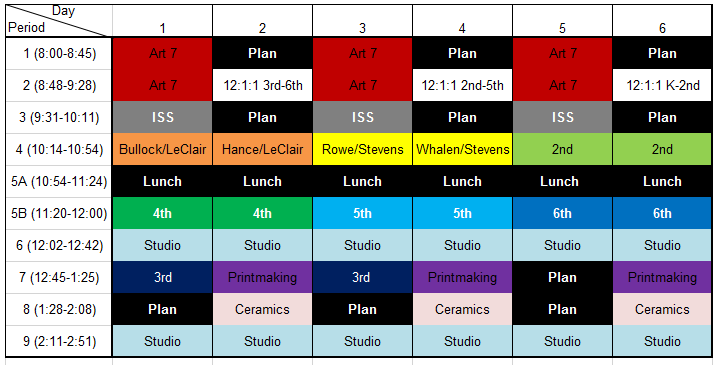
You'll also notice that I have THREE 12:1:1 classes this year...we added another teacher in our district.  AND, we added a third Kindergarten and third 1st grade teacher...those classes come combined to special, which really stinks for numbers and the amount of space I have in my room.

Needless to say, with the increase in numbers in our district, this is another reason I think hiring a party time teacher will be feasible for next year...hopefully!  Oh, and I'm doing art club this year AND I'm the VP for our teacher's union!!  That's it...I stop the ball there.  I'm not putting myself out there anymore this year.  If I do, remind me to say, "No!"  I'm still working my Jamberry business at home, and I plan on posting here once a week.  I know I won't be able to afford more then that, so one post a week is my goal!!

Wednesday, September 10, 2014

What's New in My Elementary Room!

Well, this organizational technique isn't exactly new...but I wanted to share.  This is how anal I am about organization at school...I wish I could be this organized at home!  Every year when I unpack my supplies, all of the paint and glaze gets the date written on the cap and I always rotate stock.  I also must have everything organized in the color of the rainbow!  I did a little moving of supplies and finally got all of my paint off of the exterior wall of my room.  There has been so much paint that has been ruined from the extreme cold temperatures that happen at those walls.  When I moved into the classroom four years ago, I threw out TONS of paint that was really old, had separated or became super chunky and smelly from getting really cold.

Next comes my supply bin storage.  In the past, the bins were placed in one spot and the crayons bins were stacked in another.  In an effort to try and teach the students better organization, I have placed a colored dot on the counter where their supply bin AND crayon box must go.  I'm hoping that they will start to be more mindful of keeping the pencils in the pencil box, keeping the glue together and not mixed in with the scissors...we shall see how this goes!

Once again, I have the "New Pencil Jar", where students can get new pencils when theirs become very small or broken in their supply bins.  They put the bad pencil in the red jar and take a new pencil from the green jar.  My Sharpies, which I posted about in the previous post, are located on the table, as well as a box of replacement glue sticks.  
The bottom two pictures show the new supply bin set-up on my counter.  In between the warm colored bins and the cool colored bins is a paper shelf with the colored construction paper and white drawing paper.

This is a new classroom management idea I found on Pinterest.  I found this awesome velcro board at Biglots for $3.  I wrote down my five most commonly abused classroom rules and/or procedures, and made some green, yellow and red faces.  I laminated them all and velcroed them to the board.  Most teachers in our district use the red, yellow, green stoplight idea for discipline, so I'm hoping this will work well, especially for the younger kids.  I have this on my door facing the hallway so that their teacher can see how they did as they come to pick them up.

This is also a new classroom  management technique I am going to try and use for the younger grade levels.  Again, this is another Pinterest steal.  What's great is that this correlates really well with the smiley faces on the door!

Last but not least is my "Art Applause" box.  I wanted to come up with a way for students, faculty, administration and community members to give the students positive praise for their artwork.  This is a great way for the kids to be "bucket fillers", if you know what that is.  It's also a creative way to encourage positive reinforcement and should gain me some points on the Marzano rubric for my APPR! ;)  I have some blank slips left out on the table with a pen.  I will encourage everyone to write a nice message to an artist whose artwork is displayed and drop it in the box.  Every week I plan to empty the box.  I may staple some of the nice comments on the bulletin board with the artwork.  Every student will eventually get their comment to take home.


Wednesday, August 28, 2013

My neglected elementary room...(photo heavy post)

I'm reading all of these posts from other art teachers who have already gone back to school with their kiddos...and here I am, neglecting my elementary art room!  I've spent A LOT of time in the high school room and with a week left before students arrive, I figured it was about time I spent some time in the elementary room!

Since I knew that I was going to be taking on the high school experience, I didn't take down the decorations or posters in the elementary room.  Though it's going to bug me to not have much of a change in that room for two years, I'm just going to have to deal with it.  (I'm one of those peoples who has to rearrange my living room furniture every few months or I go nuts!)

The first step was redoing my school teacher page.  I've been working on that since Friday.  Our school website was recently revamped by a new website host and the process of doing our teacher webpages is now EXTREMELY easy...just like using Microsoft Word (which is great because it's been a while since I've used HTML coding!)  Then, yesterday I spent about five hours in the room organizing, laminating, taping, and getting ready to do the final touches in the next day or so!

New sink feet to keep those little ones in line at the sinks.  

New table signs.  These are a little smaller then last year's signs.  I've also added numbers that will correspond with the job list.  Instead of each table having a single job at clean up, each student at each table will now have a different job at their own table.  This will hopefully make clean-up going even smoother than before, especially when one table finishes ahead of others.  I was smart this year...I made an original, black and white and brown paint palette and then made colored copies.  This way, if I have to put a new palette sign out, all I need to do is copy off a new one, color it the color it needs to be, laminate and change it!

Since I'm only seeing students once a cycle on the elementary end, I changed my Artist of the Week to Artist of the Month.  Just did a quick rewrite on white paper, taped it over the word and re-laminated the sign.

I finished putting away my art supplies...I strongly suggest, if you don't already, writing the date on your supplies when you get them, particularly paint, glaze and gallons of glue!  This way, you can easily rotate your stock and use the older supplies first!  This will prevent paint from getting old, separated and being thrown out and wasted.

My tempera paint cabinet is quite full this year...The short bottles on the bottom are extras that have been given to me over time by other teachers cleaning out their rooms.  I don't order the small bottles (except for the gold, silver and fluorescent temperas).  If teachers come looking for paint, I usually give them the small bottles to use.  I can guarantee that if you pulled out this paint, it is completely rainbow organized and everything is dated on the cap!

Just as a side note, using these paint containers last year was the BEST decision I ever made!  I wasted very little paint!  My tempera cabinet is extremely full and I probably won't have to order much paint for next year!  We always have to do our requisitions for the following year around February, so it's always a bit of guess work on the amount to order.

I purchased this set of tempera cakes for my classroom...I've never used them before and any input would be greatly appreciated!  

The supply bins weren't really that beat up, so I decided that they didn't need a new coat of spray paint this year.  They are all organized and ready to go for the new school year!

The kids will be excited for new scissors!  The old scissors weren't very sharp anymore and even students who had a good grasp on scissor skills struggled with cutting sometimes.  I bought new Fiskars for this year.  I also added some skinny markers to the bins.  I bought new Mr. Sketch skinny markers to pull out on specific projects, but I still have about 3 1/2 bulk boxes of used skinny sketch markers, so I decided to put them out and let them be used for free draw assignments.  It's time to start letting go of some of those older supplies!

Each pencil bin has four pencils, four erasers and a hand-held pencil sharpener.  The kids end up using the loud sharpener too, but this at least lessens the line at the big sharpener.


I pulled this paper organizer from another teacher's hallway trash this summer.  One of the supplies I ordered this year was a class pack of construction paper crayons.  Since I have such a surplus of construction paper, I think I'll gear more of my projects to involving crayons on construction paper, at least for the K-2 kids.

These are my bulletin board signs.  I made fresh ones for this school year since we have new elementary teacher assignments and new elementary teachers.  I simply created these in Word and made a sign for each classroom teacher.  I also made signs for each grade level.  Then, all I do is write the project title and staple the sign on the board with their projects!  Makes for less paper waste.

Finally, the last thing I accomplished, with the help of my hubby, was turning some of my chalkboards into white boards.  Am I weird that I can't stand the feeling of chalk on a chalkboard?  Or on paper for that matter!  I don't think I will EVER do a chalk pastel project!  I hate the sound and that feeling of chalk...so I bought a roll of Go Write! Dry-Erase Paper on-line from Walmart.  This is definitely a two-person job!  Here's how we did it:
First we unrolled the paper and cut it to size of the chalkboard.  We peeled back the plastic and bent it to show the sticky surface.

We attached and aligned the plastic on the chalkboard (of course I couldn't buy a roll big enough to cover the board in one piece, so I had to use two here)..

...and then slowly, I pulled the plastic backing down while my hubby used a straight edge to bring down the bubbles out of the paper as it stuck to the chalkboard.

The elementary white board is complete!  This is now where I will write objectives and have the job list.

We went down to the high school room to do the same, but ran into some problems.  We wasted about 4' of paper.  As we got to the end of the roll, there were more air bubbles already in the plastic.  When we tried to smooth them out using the same technique as before, we stretched and wrinkled the paper on the board, so we had to change tactics.
This time, we used a razor to score a line on the back plastic.  Instead of going horizontally, against the bubbles, we went vertically, with the bubbles and wrinkles.

Then, I pulled the plastic, one side at a time, off as hubby vertically used the yard stick to press out the air bubbles.

Since we wasted 4', we couldn't cover both boards, but I think I like them like this.  I haven't decided yet, but I will probably use the colored duct tape to make a border around these.  Home Depot has circle dry erase stickers that I may purchase to put below the white dry-erase space (though they are quite expensive, so it's a distant thought at the moment).  My thinking is that one board will be the 7th grade board and one will be the Studio Art board.  If I purchase the circles, one circle would be that class's bell ringer, one would be their exit slip question, and one would be their homework assignment.