Saturday, August 31, 2013

7th Grade Graffiti Overview


So here is the unit I plan to start with in Art 7, once we've finished our pre-assessments, of course.  Last year, these students, as 6th graders, asked to do a graffiti unit, but we ran out of time.  When I met with the upcoming 7th graders at the end of the school year, I asked for input on what they wanted to learn about in Art 7, and the first thing that topped their list was graffiti.  I've talked a bit about this graffiti unit in previous posts very briefly; mostly about how I knew very little about this art style and movement!

GRAFF The Art & Technique of Graffiti
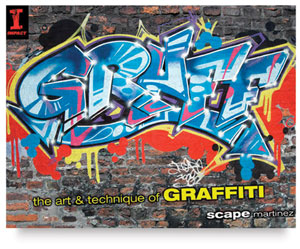
I've utilized this book by Scape Martinez to build the unit.  I ordered it from Dick Blick.  It has a nice, brief overview of the history of American Graff writing, or graffiti, and has really great directions and pictures of how to create your own individual tag.  I ordered the Graff Color Workbook as well, which contains a lot of the same information, but also has some great drawing and design prompts, which I will probably use during the school year for sub plans and bell ringers.  I've gotten a lot of information  and ideas from the book alone that I haven't really dived into the workbook that much yet!
Unit Introduction:

As with any unit plan, Marzano believes that you should always have a good introduction to the unit and I second that!  The introduction is used as a way to introduce a new topic to students, as well as find out what they may already know about that topic.  An introduction lesson does not have to be a full class period...in college we were encouraged to make the introduction lesson 15-20 minutes in length.

For my intro. to graffiti, we will begin with a discussion about graffiti as art versus vandalism.  It will be interesting to see how this discussion goes, especially since I live in a very rural area where a majority of the graffiti that is seen is on the side of the trains!  This discussion will also give us a chance to talk a bit about how to participate in graffiti legally!  I'll round out the end of the class with some YouTube videos about graffiti and an appropriate exit slip question.

Lesson 1:  History of Graffiti
It only seems fitting that for the first lesson of this graffiti unit, students learn about the history of graffiti.  This would be part of what Marzano calls the "acquiring and integrating" aspect of a unit.  Students will learn about some famous graffiti artists, including Taki 183 (who is credited with starting the tag idea), Keith Haring (who combined his graphics art training with subway art), Bansky (who is an anonymous contemporary graffiti artist), and Scape Martinez (the author of the Graff books).  Easy way to incorporate the Common Core ELA Shifts when students are asked to read brief news articles and biographies about each artist.

 Lesson 2: What is a tag?
The second unit will involve learning about the importance of a tag in graffiti.  Graffiti art revolves all around an artist's tag.  This acquiring and integrating lesson will be less about note-taking and more about brainstorming individual tag ideas.  The following is included in the student's note packet and is a summary of information taken directly from the Graff book:

When choosing a tag, think of the following:
1.      How does it sound?
a.       What does it make you think of?
b.       REVOK vs. SLICK
2.      How does it look when it’s written?
a.       How do the letters look when written together?
b.       Is there rhythm to the way your letters look?
3.      Length
a.       Don’t make your name too big
b.       Short and to the point
c.       Ideally, no more than 6 letters
4.      What does your name mean?
a.       Sometimes it doesn’t mean anything, just sounds cool
b.       Some names stand for a hidden meaning
5.      Numbers?
a.       Early artist’s incorporated numbers, which stood for the street number they lived on…i.e. 125th street in NYC = SCAPE 125
b.       Numbers can be used for purely a design element…i.e. MODE 2
6.      Some other tips:
a.       Double A’s and E’s promote balance
b.       Q, X and Z are letters that are often difficult to work with
c.       Be creative with spelling
                                                               i.      Interchangeable letters (C and K)
                                                             ii.      ESCAPE became SKAPE, which was finalized to SCAPE
Here's where a homework assignment comes into play.  Students will need to brainstorm tag names for themselves.  I expect at least five ideas.  The bell ringer for the next class will be to get into groups and discuss each other's ideas.

  Lesson 3: Elements and Principles of Graffiti?
The final acquiring and integrating lesson will talk about the design aspects of graffiti.  We will review the elements and principles, as well as the more specific graffiti design vocabulary mentioned in the Graff book.  According to Martinez, tags can be broken up into four elements: letter text, arrows, flourishes and symbols.  We will review what each of these elements are and students will have to draw a picture in their notes for reference.

This is also where we will get into the different styles of graffiti: Bubble letters, block letters, semi-wildstyle, wildstyle and 3-D wildstyle.  Again, I'll ask students to write down a definition and draw their tag using each style in their notes.

The final aspect of any good unit, according to Marzano, is the extending and refining portion.  This is where students should take what they have learned, apply it and "refine" their understanding of the information through its use.  All along in this unit, students will be asked to complete homework assignments in their sketchbook to design their tag.  The extending and refining portion will happen when they have to make their final tag design on the cover of their sketchbook (rubric for this is still in the works).  They will also have to take a final assessment in the form of a quiz, where they will be expected to recall vocabulary definitions and draw examples for certain vocab words.

I know there's A LOT of information in this post that doesn't necessarily relate to art and graffiti (ahem, Marzano?). I feel like I am very lucky that my school chose Marzano over the Danielson Framework for our APPR because in my art education courses at St. Lawrence University, the textbook of choice was Marzano's A Different Kind of Classroom, so I have a bit of a heads up on this whole Marzano thing compared to other teachers in my district.  I am not very familiar with the Danielson Framework, but hopefully there is a cross-over in some of this information that can be found useful for those who have to use Danielson!

26 Weeks and counting!

As probably one of the last blogging art teachers to start school up, I'm sitting in the recliner right now, enjoying my last weekend of freedom...in the damp, humid summer-like weather that NY is experiencing right now!  Can I just say (and I'm sure other Northern New Yorkers would hate me for saying this right now...but) that this pregnant lady is ready for the cold weather???  Bring on the snow!
Last week's bump photo...as of this last Friday, I'm currently 27 weeks!

Onto more lesson planning...Staff development for me is this Tuesday and Wednesday...kiddos come back Thursday.  Soon to follow: an overview of my 7th grade graffiti unit!

Friday, August 30, 2013

High School Art Room Rules & Objectives Boards

Yesterday I made a pretty big dent in getting some classroom posters and displays done.  Well, not bulletin board displays, but my objectives boards.  You can see what my objectives board looked like on this previous post.  Previously I used laminated pieces of paper to write the objectives on and change out.  I did it religiously at first, but honestly started slacking as the year drew on.  With the addition of my new dry-erase board, I'm hoping it'll be easier for me to change objectives daily!

Now, I have the objectives that will be down the left side of the board.  I wanted to keep the "Mona Lisa" prompt on the front board because it's easy to point out as a reminder to everyone, and I minimized the art jobs portion.  I minimized the jobs from 6 down to 4...my jobs used to be: Pass out and collect supply bins, pass and collect artwork, wash tables, dry tables, clean paint brushes, and sweep the floor.  The kids never really had to sweep the floors, and I only have one broom, so it seemed pointless to keep that job.  Now each person at a table will be in charge of a job for their own table, instead of the whole classroom (pass out and collect supply bins, pass and collect artwork, wash & dry tables, clean palettes and brushes).

Here is my high school room objectives board.  I used the Hawaiian print duct tape to add a border around the dry-erase board...and then it dawned on me...why don't I use the duct tape for a border on my bulletin boards instead of the staple borders???  I'm CONSTANTLY re-stapling and fixing those borders from the kids rubbing on them...  These boards will each contain the bell ringer, objectives, homework assignment and exit slip question for each class.
I didn't have enough dry-erase paper to do a third board, so I turned this movable white board into the electives objective board.

Finally, the other thing I accomplished yesterday was getting my rules posted in the high school room.  I've had this pin on my Classroom Management board for a while and as I was surfing through to find quick and easy ways to post my rules, I decided to steal from it!  Copying is the highest form of flattery, right?  Well this inspiration came from a 2011 post from Mr. E.  I liked how he used the bright colors and the way he organized the rules so I borrowed!

I don't have my rules all displayed in one space, though.  There are three bulletin boards in this room, of which I plan to devote one to each high school class, depending on what topic we are covering at the time.  There are also two bulletin boards near the door, but they aren't really in clear site, so I didn't want to put all the rules there.  Much like my elementary classroom, I tried to place the rules where they would make sense.

My rules are as follows in my syllabus and on-line for parents to view:

Classroom Rules, Expectations and Procedures – What Mrs. Impey expects from you…
1.     Respect your peers, their artwork and their feelings.
2.    Respect other teachers, school property and supplies in the classroom.
3.    Be on time to class.
4.    Be prepared for class.  Bring a pencil, your sketchbook, your folder and any assignments with you every day.
5.    Ask questions.
6.    You will be evaluated in terms of the effort you put forth, critique participation, art projects, quizzes and homework assignments.
7.    Work until you are asked to clean up.  Clean-up will commence no sooner than five minutes before the end of class.  Clean up your area and check to see that “community areas” are clean as well.
8.    If you are absent it is your responsibility to find out what you missed and to discuss with me how we can work together to catch you up.
9.    Come to class with an open mind, lots of creativity and the willingness to have fun!
 
Consequences
1.     Being tardy to class three times will result in a write-up.
2.    Any student who refuses to work will receive an automatic write-up and a visit to the office.  A call home will also follow.
3.    Any student who does not follow the rules, expectations and procedures will receive a warning.  On the second offense it will be a call home.  The third offense will result in a write-up.
4.    It is your decision on how well you complete your projects, classwork and homework. Your grades are a reflection upon yourself, your attitude and your willingness to try your best.  If you do not complete your work, it will reflect in your grade.

What you can expect from Mrs. Impey…
1.     I promise to offer constructive and positive feedback.
2.    I promise to review and discuss all rubrics before an assignment is begun.
3.    I promise to listen to your ideas and input for art projects during the school year.
4.    I promise to foster a safe and fun environment for you to create art in.
5.    I promise to provide you with the tools you need to achieve success on an artwork, including visual examples, rubrics, supplies and resources.

We are not all artists, nor do we possess the same interests and talents, likes or dislikes.  We do, however, all possess the ability to be positive and to put forth an honest effort, which is all that will ever be expected.  If your attitude is positive, the class and your artwork will be great!  Thank you for your cooperation and the promise to participate to the best of your ability!  I am looking forward to an awesome year of artwork and memories in the high school art room!

And here are the simplified, classroom versions:


Clean-up rules near the sink..."Are you prepared?" in the window outside the doorway...

And I added the exit slip sign...

My travel tote for between classrooms...right now it has dry erase markers, eraser and cleaner, highlighters, colored pens, a small box cutter and extra Post-It notes...

Wednesday, August 28, 2013

My neglected elementary room...(photo heavy post)

I'm reading all of these posts from other art teachers who have already gone back to school with their kiddos...and here I am, neglecting my elementary art room!  I've spent A LOT of time in the high school room and with a week left before students arrive, I figured it was about time I spent some time in the elementary room!

Since I knew that I was going to be taking on the high school experience, I didn't take down the decorations or posters in the elementary room.  Though it's going to bug me to not have much of a change in that room for two years, I'm just going to have to deal with it.  (I'm one of those peoples who has to rearrange my living room furniture every few months or I go nuts!)

The first step was redoing my school teacher page.  I've been working on that since Friday.  Our school website was recently revamped by a new website host and the process of doing our teacher webpages is now EXTREMELY easy...just like using Microsoft Word (which is great because it's been a while since I've used HTML coding!)  Then, yesterday I spent about five hours in the room organizing, laminating, taping, and getting ready to do the final touches in the next day or so!

New sink feet to keep those little ones in line at the sinks.  

New table signs.  These are a little smaller then last year's signs.  I've also added numbers that will correspond with the job list.  Instead of each table having a single job at clean up, each student at each table will now have a different job at their own table.  This will hopefully make clean-up going even smoother than before, especially when one table finishes ahead of others.  I was smart this year...I made an original, black and white and brown paint palette and then made colored copies.  This way, if I have to put a new palette sign out, all I need to do is copy off a new one, color it the color it needs to be, laminate and change it!

Since I'm only seeing students once a cycle on the elementary end, I changed my Artist of the Week to Artist of the Month.  Just did a quick rewrite on white paper, taped it over the word and re-laminated the sign.

I finished putting away my art supplies...I strongly suggest, if you don't already, writing the date on your supplies when you get them, particularly paint, glaze and gallons of glue!  This way, you can easily rotate your stock and use the older supplies first!  This will prevent paint from getting old, separated and being thrown out and wasted.

My tempera paint cabinet is quite full this year...The short bottles on the bottom are extras that have been given to me over time by other teachers cleaning out their rooms.  I don't order the small bottles (except for the gold, silver and fluorescent temperas).  If teachers come looking for paint, I usually give them the small bottles to use.  I can guarantee that if you pulled out this paint, it is completely rainbow organized and everything is dated on the cap!

Just as a side note, using these paint containers last year was the BEST decision I ever made!  I wasted very little paint!  My tempera cabinet is extremely full and I probably won't have to order much paint for next year!  We always have to do our requisitions for the following year around February, so it's always a bit of guess work on the amount to order.

I purchased this set of tempera cakes for my classroom...I've never used them before and any input would be greatly appreciated!  

The supply bins weren't really that beat up, so I decided that they didn't need a new coat of spray paint this year.  They are all organized and ready to go for the new school year!

The kids will be excited for new scissors!  The old scissors weren't very sharp anymore and even students who had a good grasp on scissor skills struggled with cutting sometimes.  I bought new Fiskars for this year.  I also added some skinny markers to the bins.  I bought new Mr. Sketch skinny markers to pull out on specific projects, but I still have about 3 1/2 bulk boxes of used skinny sketch markers, so I decided to put them out and let them be used for free draw assignments.  It's time to start letting go of some of those older supplies!

Each pencil bin has four pencils, four erasers and a hand-held pencil sharpener.  The kids end up using the loud sharpener too, but this at least lessens the line at the big sharpener.


I pulled this paper organizer from another teacher's hallway trash this summer.  One of the supplies I ordered this year was a class pack of construction paper crayons.  Since I have such a surplus of construction paper, I think I'll gear more of my projects to involving crayons on construction paper, at least for the K-2 kids.

These are my bulletin board signs.  I made fresh ones for this school year since we have new elementary teacher assignments and new elementary teachers.  I simply created these in Word and made a sign for each classroom teacher.  I also made signs for each grade level.  Then, all I do is write the project title and staple the sign on the board with their projects!  Makes for less paper waste.

Finally, the last thing I accomplished, with the help of my hubby, was turning some of my chalkboards into white boards.  Am I weird that I can't stand the feeling of chalk on a chalkboard?  Or on paper for that matter!  I don't think I will EVER do a chalk pastel project!  I hate the sound and that feeling of chalk...so I bought a roll of Go Write! Dry-Erase Paper on-line from Walmart.  This is definitely a two-person job!  Here's how we did it:
First we unrolled the paper and cut it to size of the chalkboard.  We peeled back the plastic and bent it to show the sticky surface.

We attached and aligned the plastic on the chalkboard (of course I couldn't buy a roll big enough to cover the board in one piece, so I had to use two here)..

...and then slowly, I pulled the plastic backing down while my hubby used a straight edge to bring down the bubbles out of the paper as it stuck to the chalkboard.

The elementary white board is complete!  This is now where I will write objectives and have the job list.

We went down to the high school room to do the same, but ran into some problems.  We wasted about 4' of paper.  As we got to the end of the roll, there were more air bubbles already in the plastic.  When we tried to smooth them out using the same technique as before, we stretched and wrinkled the paper on the board, so we had to change tactics.
This time, we used a razor to score a line on the back plastic.  Instead of going horizontally, against the bubbles, we went vertically, with the bubbles and wrinkles.

Then, I pulled the plastic, one side at a time, off as hubby vertically used the yard stick to press out the air bubbles.

Since we wasted 4', we couldn't cover both boards, but I think I like them like this.  I haven't decided yet, but I will probably use the colored duct tape to make a border around these.  Home Depot has circle dry erase stickers that I may purchase to put below the white dry-erase space (though they are quite expensive, so it's a distant thought at the moment).  My thinking is that one board will be the 7th grade board and one will be the Studio Art board.  If I purchase the circles, one circle would be that class's bell ringer, one would be their exit slip question, and one would be their homework assignment.


Monday, August 26, 2013

High School Observational Drawing Rubric

Taking a break from my curriculum planning, I've been working on my pre- and post-assessment plans for my high school SLOs for this year.  I've decided it's going to be a two-part assessment.  Although I was lucky enough last year on the elementary end to not have to incorporate any writing pieces, I'm being asked to incorporate a writing component on the high school end, so here is my plan.

The first part will be an observational drawing of some sort.  I plan to use the same observational drawing rubric for both 7th grade and Studio Art.  At this point, I'm not sure if I'll have them do the same subject, but I do know that I want the Studio Art students to draw their hand.  (The teacher I graded post-assessments last year did this and I liked it!).  The first drawing will be a one-day drawing and the post-assessment will probably be a 2-3 day drawing, where hopefully the students will incorporate more creativity in the pose and background of their hand.  I'm debating about having 7th graders do their hands as well, or a still life, or quite possibly their shoe (or maybe even a self-portrait!).

Here is my preliminary observational drawing rubric that I've been working on today.  It is a combination of ideas taken from the regional art assessment rubric that we created last year at Boces, and some of my own ideas.


4
3
2
1
0

Technical Accuracy

_____

“Draw what you see, not what you know.”  Accurately drew shapes, proportions, contours and details. Drawing is expressive and detailed.
Attempted to draw what was seen.  Attempted to draw proportions correctly and points of overlap.  Drawing is expressive and somewhat detailed.
Somewhat drew what was seen however proportions are not exact; student did not observe and draw points of overlap.  Drawing is somewhat detailed.
You can tell what the student was observing in the drawing, but proportions are not correct.  Did not observe and draw any points of overlap. Drawing lacks almost all details.
Student did not do an observational drawing.  Drawing has no details.

Shading/Value

_____
Student successfully incorporated all 8 ranges from the gradient scale with smooth transitions. Student used at least 3 shading techniques to create value. Student accurately observed and shaded highlights and shadows, and the direction of the light source is apparent.
Student incorporated 6-7 ranges from the value scale with smooth transitions.  Student used 2 shading techniques to create value.  Student observed and shaded highlights and shadows.  Viewer can see where the light source comes from.
Student incorporated 4-5 ranges from the value scale with rough transitions.  Student used 1 shading technique. Some highlights and shadows are observed, but not very accurately and they do not match the light source.
Student incorporated 2-3 ranges from the value scale with very rough transitions.  Only used 1 shading technique.  Very vague representations of highlights, shadows and light source.
Did not create value in drawing.  No transitions.  Only black and white.  No shading techniques used.  No highlights, shadows are light source are drawn.
Elements of Art

_____

Student understands and uses the elements (line, shape, form, space, texture, value, & color) to create a successful and interesting artwork. Student has a strong sense of line, both real and implied.
Student uses the elements to create a successful artwork. Student understands the basics but has not experimented.  Student uses real and implied line.
Student attempts to use the elements.  Student shows a minimal understanding of the basics of the elements.  Student uses real line.
Student unsuccessfully uses the elements; shows a very minimal understanding of the basics. Student uses real line.
It is clear that the student does not understand how to use the elements. No attempt at organizing the elements.
 
Composition

_____
Student understands and uses principles of art (rhythm, movement, balance, proportion, variety, emphasis, harmony and unity) to create a strong and interesting composition.  Utilized the positive and negative space extremely well on the paper. 
Student used the principles of art to create an interesting composition.  Utilized the positive and negative space well on paper. 
Student attempted to use principles to create a composition.  Attempted to use the positive and negative space well on paper; drawing takes up ½-3/4 of the paper space.
Student did not use the principles well to create an interesting composition.  Did not use space well; drawing only takes up ½ of the paper space.
Student did not use the principles of art to create an interesting composition.  Did not use space well; drawing is very small and/or takes up less than ¼ of the paper.

Creativity

_____

Student has taken the technique being studied and applied it in a way that is totally his/her own.  The student's personality/voice comes through. Everything is original.
Student has taken the technique being studied and has used source material as a starting place. The student's personality comes through in parts of the painting. Everything is original.
Student has copied from another source. There is little evidence of creativity, but the student has done the assignment.
Student has not made much attempt to meet the requirements of the assignment. A majority of the assignment has been copied from another source.
No creativity attempted.  Artwork is a direct copy from another source.
Craftsmanship / Presentation

_____

Utilized time appropriately.  Artwork is created and maintained in a professional manner.  No tears, smudges, or stray marks.  Artwork is neatly signed in the appropriate spot.
Utilized time appropriately.  Artwork is created and maintained fairly neatly.  No tears, minimal smudges or stray marks.  Artwork is neatly signed in the appropriate spot.
Could have utilized time better.  Artwork is created and maintained with an attempt at neatness.  Artwork may be torn, smudged or have stray marks. Artwork is signed.
Did not utilize time well.  Artwork is poorly created and maintained.  Artwork is torn, smudged, or has stray marks that distract from the image.  Artwork is sloppily signed.
Artwork is not finished, was folded, crumpled up, ripped, etc.  No signature on artwork.
I'm not sure if I'm going to keep the elements and composition descriptor...I might combine them into one?

I think I was having a brain fart during this rubric creation because I was really struggling on how to word some of these descriptors, so I headed over to RubiStar for help.  Have you used this site before?  It's really great for making rubrics for any subject area.  You don't have to create a log-in to use it, but if you do, you can save your individually created rubrics to your account.  There are seven rubric types to choose from for art.  You can choose and edit the descriptors, edit the grade numbers and descriptor titles.  You can even add your own.  

The second part of my pre- and post-assessment will be an art quiz.  At the end of the year, I am expected to give a final exam like all other subject areas, so instead of bombarding the students with a second post-assessment type exam, I'll just make the final exam the post-assessment.  Hopefully using eDoctrina will make this exam generation painless and easy, as I plan to enter in all of my unit quiz questions into a test bank.  I'll give the students a brief quiz at the beginning of the year and couple that score with the observational drawing for my pre-assessment score for each student.

The quiz portion will also include the written portion.  Again, RubiStar already has a rubric for artwork analysis so I pulled that rubric directly from the website to use.  The only thing I will be adding is a descriptor for grammar and sentence structure.

CATEGORY 4 3 2 1
Description Makes a complete and detailed description of the subject matter and/or elements seen in a work. Makes a detailed description of most of the subject matter and/or elements seen in a work. Makes a detailed description of some of the subject matter and/or elements seen in a work. Descriptions are not detailed or complete.
Analysis Accurately describes several dominant elements or principles used by the artist and accurately relates how they are used by the artist to reinforce the theme, meaning, mood, or feeling of the artwork. Accurately describes a couple of dominant elements and principles used by the artist and accurately relates how these are used by the artist to reinforce the theme, meaning, mood, or feeling of the artwork. Describes some dominant elements and principles used by the artist, but has difficulty describing how these relate to the meaning or feeling of the artwork. Has trouble picking out the dominant elements.
Interpretation Forms a somewhat reasonable hypothesis about the symbolic or metaphorical meaning and is able to support this with evidence from the work. Student identifies the literal meaning of the work. Student can relate how the work makes him/her feel personally. Student finds it difficult to interpret the meaning of the work.
Judgement Uses multiple criteria to judge the artwork, such as composition, expression, creativity, design, communication of ideas. Uses 1-2 criteria to judge the artwork. Tries to use aesthetic criteria to judge artwork, but does not apply the criteria accurately. Evaluates work as good or bad based on personal taste.