Showing posts with label sand. Show all posts

Sunday, June 16, 2013

6th Grade Aboriginal Sand Paintings

I had posted previously that the last unit in 6th grade was going to be an Indigenous Cultures unit.  We just BARELY finished!  One class completely finished their projects and the other class has one more art class this week to finish their sand paintings!  (Check out some samples of this project that I did with Studio Art when I did my student teaching.)

Students designed their sand paintings using one Australian animal and at least 3 Aboriginal symbols on 6"x 6" Masonite board.  We primed the board with gesso and then when dry, transferred the design on the board.  I had the students do one color of sand at a time.  They squeezed the glue onto the designs (and used a paintbrush to spread it if need be), sprinkled the sand on, dumped the extras onto a folded piece of tag board, and then dumped it back into the sand bottle.  They did the background last, and then glued on beans, split peas, etc. if wanted.

I was hoping to have enough time to get into a Dreamtime story or two, but we won't this year, however I still wanted to share the awesome website I found that deals with Aboriginal Dreamtime stories.  It's called Dust Echoes. There are video versions of each story on-line that you can watch, or you can print out the PDF study guide for each story.  The study guide contains the story with teacher notes on the side to explain what the story is about.  It has a page of classroom activities that can be done with the story, as well as student worksheets that have a variety of questions and activities.  Definitely take the time to check out this website...it is so worth it!


Wednesday, April 17, 2013

2nd Grade Printmaking Unit: Gyotaku Prints

And finally, for the last post in this series, the final project in the 2nd grade printmaking unit...Gyotaku prints! There have been quite a few blogs showcasing Gyotaku prints lately...it seems this is the time of year that they are popular!

The first year I started teaching, I bought this 9-piece set of rubber fish from Dick Blick and I've used them with multiple classes since then!  I don't generally use all of the fish though...the starfish and really small, skinny fish are harder to take prints off of, and the way the students sometimes manhandle them, I know they'd fall apart quicker.  A few of the larger fish are starting to crack a little bit where the smaller fins are attached, so if you have these or are going to get them, make sure you teach the students to handle them and wash them with care!

Anyways, here's what we did for the Gyotaku prints.  I've done Gyotaku prints differently each time I've done them, and so far I like this version the best!

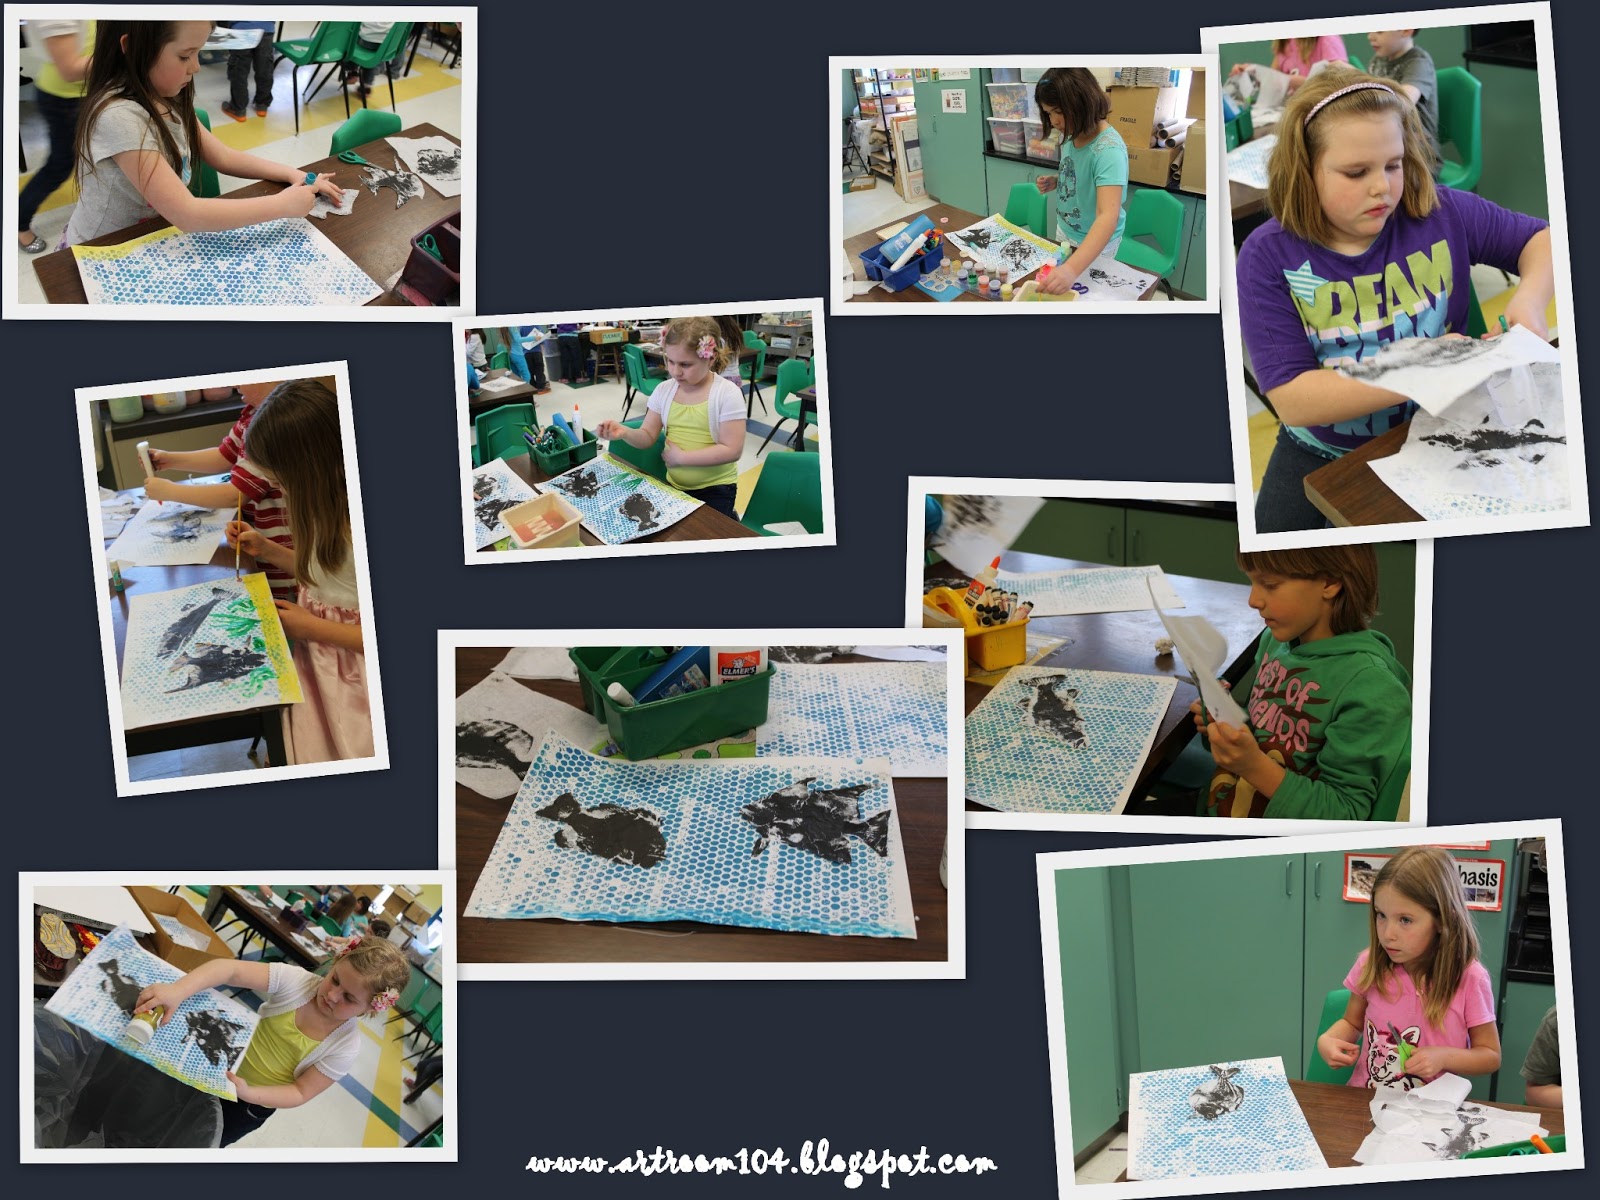
On the first day, I set up multiple stations around the room.  At three stations there were a stack of white tissue paper, two pencils, two brayers, two bench hooks, one tube of black ink and two fish.  At two stations, there was two brayers, two bench hooks, a tube of blue and turquoise ink, and two pieces of bubble wrap large enough to cover a 12"x18" piece of drawing paper.  Finally, at my 6th table, I had a stack of 12"x18" drawing paper and pencils.

At the beginning of class, we looked quickly at a power point about Gyotaku prints and looked at the Hawaiian artist and fisherman Naoki Hayashi.  We talked about the history of Gyotaku and looked at pictures of artists using real fish to make prints.  Afterwards, I did a demonstration at the two stations of what students needed to do.  At the bubble wrap station, students put a glob of blue and a glob of turquoise ink on the same bench hook and rolled them together to make a swirled color on the bubble wrap.  By this point, we had about 20 minutes left in class to make three fish prints and one background print.

On the second day, students chose two of their best fish from their three prints to cut out and glue to their background (with a glue stick).  Then, I showed them how to add sand at the bottom using Elmer's glue and a paint brush.  Finally, I passed out metallic, fluorescent and regular colored paint for students to add details, such as eyeballs, scales, seaweed, coral, etc.


Here are some examples of how I've approached Gyotaku in the past...
During my first year of teaching, the elementary did a Christmas program that revolved around penguins.  The decorations on the stage had to be Christmas trees decorated with fish ornaments, so I had my 6th graders do these Gyotaku lacings.  They made prints of fish and then cut them out with construction paper for the back.  They punched holes all the way around and then laced yarn through, stuffing the fish with stuffing before closing it up.

Last year I did these Gyotaku prints with my Kindergartners.  They had to print 3 fish on a piece of paper.  Then, they simply colored the background with crayons.

This project I've posted about before...I did these fish on the black construction paper at the beginning of the year with the extended day program after school.

Tuesday, April 9, 2013

6th Grade: Native American & Aboriginal Art

Argh!  Where is the school year going?  This is the last week of the 3rd quarter...that means 10 weeks left!  And, I have approximately 6 weeks until my art show!  Eek!

If you haven't already checked out my pages from my first two art shows (2011 and 2012), please do so!  Every year I try to do a theme, and this year's theme is nature.  Generally what I do is keep all of the projects that fit under that theme.  We take one day to sign the fronts of our artworks and glue them onto black construction paper for a frame (if they need it).  Then, I pick 1-2 pieces from each student's stack that are their best works to hang.

I always end up having trouble with one grade level having enough artworks to fit my theme...and this year it is 6th grade!  Plus, it's taking a lot longer to get through my units than I thought it would...so I think I'm going to have to combine my Native American unit and my Aboriginal unit into one "natives" unit.  I think it might actually be a smart idea to do this because then we can compare and contrast the indigenous cultures of western and eastern world.

I've got to rework my note packets and create one that has simple notes (or maybe not do notes at all for this unit??)  I plan on doing my Native American animal spirit linocut project (which will incorporate a self-portrait in the form of an animal and the incorporation of line as texture) and I want to do fixed sand paintings based on the Aboriginal culture and symbolism.  (I did a sand painting project with a Studio Art class when I did my student teaching.)  Here are some of the past projects...once we finish up the Greek unit (hopefully by the end of the week!) I'll keep you updated on my indigenous cultures unit!


Last years linocut project was not specifically the Native American animal spirit one...but it was similar.  For these particular prints, I had asked students to depict something from nature.  They had to try and show 2-3 different types of texture using line.  


The following sand paintings were done by a Studio Art class.  We used Masonite board that was primed with gesso and sanded.  They drew their design on with pencil and Sharpie.  Then, one color at a time, they painted on Elmer's glue and sifted the colored sand onto the glue.  When I did this at the time, my cooperating teacher didn't have sand.  I went to a local pet store and asked for a donation of fish tank sand.  I used powdered tempera to color the sand, which worked really well (but also stained hands like paint).  This year, however, I have TONS of pre-colored sand so this process will be much easier!

Thursday, March 21, 2013

Eric Carle's Mr. Seahorse: Part Deux

 Today we worked on our Mr. Seahorse mixed media projects in Kindergarten "class C" and my 12:1:1 class.  We're not quite finished yet, but I'll share what we did today.  My finished seahorse project is on the right.  (If you didn't see my previous post about these and how we painted everything to get ready for the construction portion, check it out here!)


Our first step today was to cut out long, skinny triangles from the green paper to make the seaweed. This was the easy cutting part!  This was also a time when I had the students not following the gluing rules.  I showed them how to put a bunch of glue at the bottom of the plate to stick the seaweed to.  In the past, I've done similar projects and when they put dots of glue on the seaweed, it just didn't stick very well.


 The next step was to trace 3 seahorses on the back of the red paper.  I'm only having them do 3 sea horses on their projects, but this way, there are extra seahorses for people who were absent or for students who might have cut off the tails.  The seahorse was tricky for some students to cut out, but good practice for advanced cutting skills.


That's about as far the kids got today on their projects.  Here is the rest of how we are going to finish this mixed media art:

The seahorses get glued like this: two on the big plate and one on the outside.

 Next, I'll have the students paint on some glue on the bottom of the outside ring.  We'll sprinkle some yellow sand on it.

If they have any extra green paper, they can add some seaweed to the outside too.

I've already hot-glued the cellophane onto the frame plates for the students.

Next class, we'll finish the frame part of our project, add the sand, and some small seashells.  I'll hot glue the plates together, as they hold better.  When I did this project before, I had the kids use regular glue and a lot of them fell apart.