Have I mentioned that my 1st graders are a VERY difficult group this year? That being said, I had meant for this project to be completed last week so they could be hanging before November 1st and 2nd, however that didn't happen. We spent the majority of two class periods before this with our heads down, practicing being quiet. I have 24 seats in my classroom and one first grade class with 24, and one with 25 students!
Either way, the first class has finished the project and the second will finish theirs on Monday this up-coming week. This project came directly from Pinterest. What is great is that the timing of Dia de los Muertos lined up perfectly with the 1st grade NYS Common Core Listening and Learning Strand about the human body. In that strand, the students learn about the muscular system, the nervous system, and the skeletal system.
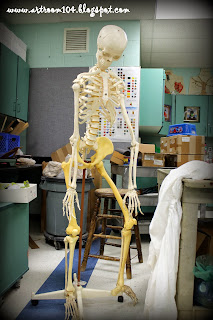
I brought down this model skeleton from the health room, which the students loved! He was, however, covered up with a sheet most of the time (which sort of made him more creepy...but otherwise he was too much of a distraction to all of the other classes!).
I had intended that this project would only take us 1 1/2 days to complete...but it actually ended up taking 2 1/2 days due to student behavior. After we finished up our pumpkin patch drawings, we took 10 minutes at the end of class to view a power point about the Day of the Dead (that was the half day). On the second day, I had intended that the students would quickly review the primary and secondary colors (since I had covered them so extensively in kindergarten), and take 10 minutes to paint their cardboard. I was planning on going over the skeletal system with them and then building the skeletons on the cardboard that day. Unfortunately, that didn't happen. It took us an ENTIRE period to paint a little 5"x7" piece of cardboard and to clean up.
So, I ended up having to take one day to paint the background and one day to make the skeletons. Since I'm getting so close to my maternity leave, I wanted to make sure these got done so they could be graded by our 10 week marking period next week. I had intended to take one more day to make the flowers but either way, we were able to make the skeletons and flowers in one class period.
We also didn't get a chance to mod podge these like in the original post from Pinterest, so I'll probably just spray them with some glossy fixative spray before I hang them.
These are the seven elements on my rubric for this project:
|
1.
Skeleton Bones (shows all major bones: skull, spine, ribs, pelvis, collar bone,
arms, legs & joints)
|
|
2.
Background
(painted background one secondary
color using two primaries)
|
|
3.
Marigolds
(built marigolds to fill in the
negative space around skeleton)
|
|
4.
Used
Creativity (positioned skeleton in
an interesting way)
|
|
5.
Used
Good Craftsmanship (Neatly glued
all pieces to cardboard.)
|
|
6.
Has a
Good Composition (Used entire piece
of cardboard.)
|
|
7.
Used
Time Wisely (Didn’t rush artwork;
didn’t waste time)
|


I love these!! Two quick questions though...How did you adhere the model magic to the cardboard? Regular Elmer's glue or hot glue? Also did the kids glue them down while the model magic was still soft? And lastly, does modge podge over the model magic do anything to it besides make it shiny?
ReplyDeleteThanks!
I ha the students use Elmer's glue all. I molde the skulls for them in a candy mold and then they rolled out snakes and glued everything to the cardboard while it was still wet. The mod podge would make it shiny but would also help keep everything adhered together, just in case they didn't use enough glue.
Delete