Wednesday, June 25, 2014

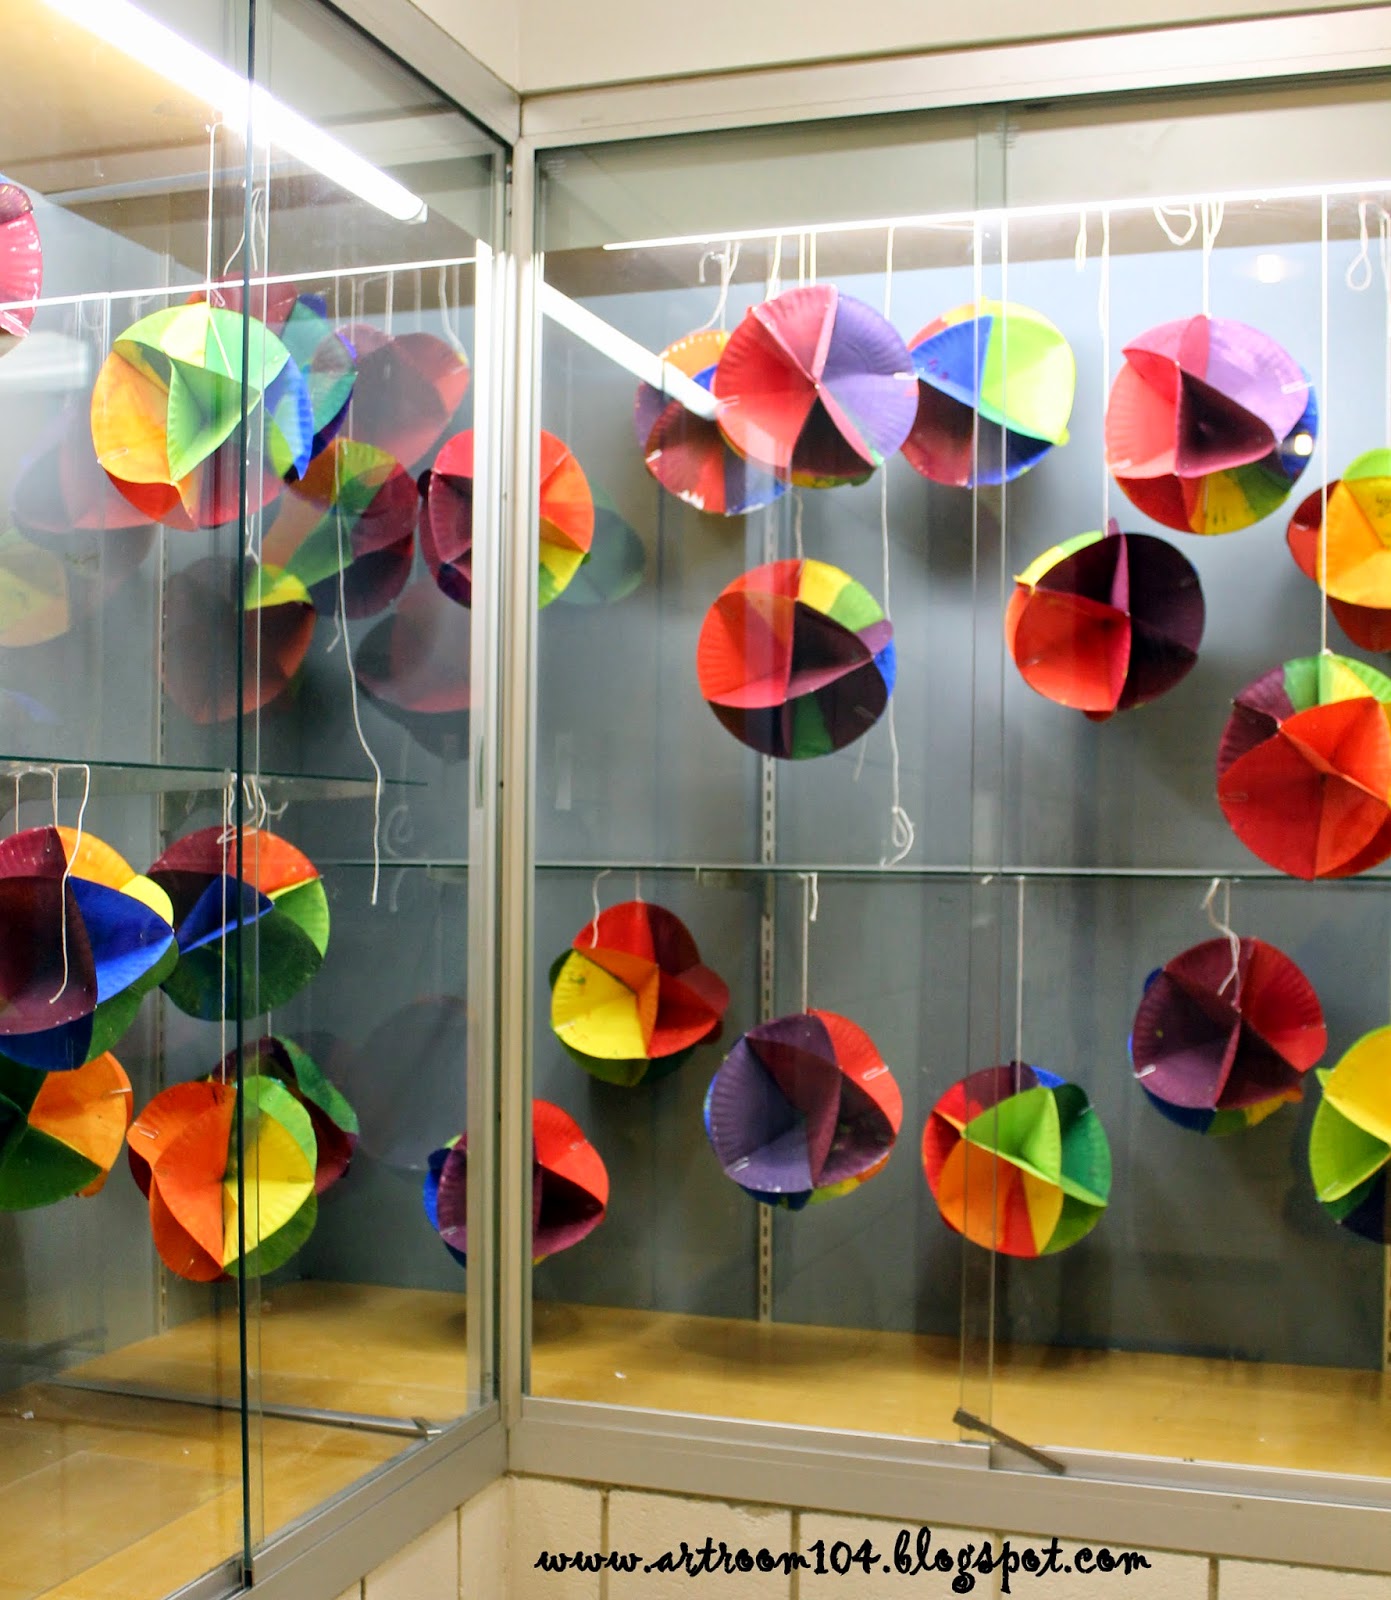
5th Grade: 3-D Color Wheel Display

A while back I shared a tutorial on how to make a 3-D color wheel out of paper plates, which I found out from a reader comment, came from the September 2010 issue of Arts and Activities.  I just wanted to share the photographs I took of these projects hanging in my display case.


My 5th grade class this year is very small so they didn't exactly fill the case very much, but the first year I did this, I had almost 50 color wheels in there and it looked amazing!


Tuesday, June 24, 2014

6th Grade: Foreign Country Stamp Designs

Once the 6th graders finished their Social Studies text book, their Social Studies teacher decided to give them a country to research.  I knew I could fly with this and decided to do stamp designs with the students. During my first year of teaching, I had purchased a package of Roylco Postage Stamp Paper but had never used it.  I dusted off that old package and pulled them out for tracing templates for the students to trace the stamp edge.

This is what I required each stamp to have (or not have!):
1. A border
2. A money amount with the country's currency symbol
3. The country's name
4. A main picture that represents something the country is famous
5. The flag can be incorporated, but it cannot be the main picture by itself.
6. Outline everything in black sharpie.
7. You can use colored pencils, pastels, watercolor pencils and markers.

Would you believe that there were A LOT of students who did not know what was on a stamp!?  When I opened this lesson up, I didn't show students any pictures, but asked if they knew what was on a postage stamp and listed it on the board.  They didn't even know how much a stamp costs!  This of course lead into a conversation about who needs stamps and why people don't pay their bills on-line...oye vey!

Eventually, we got past that conversation and I showed students examples of foreign stamps, both old and new, and then the students got to planning and creating!

France and Iran...these two were probably the best in terms of craftsmanship and proper use of the media.

Turkey and Madagascar...my two other favorites!


Madrid and Iraq...it was really hard for the students who had countries in the Middle East...they all wanted to portray war, which I wouldn't let them do!  No guns, guts, blood, etc is one of my rules...


6th Grade: Finished Greek Columns

As if you didn't have enough Greek art jammed down your throat...here's a little more!  These are the Greek columns my 6th graders completed this year.  We did these at the same time that they learned about the Greeks in Social Studies (which was shortly after they finished reading Percy Jackson and the Lightning Thief in ELA as per a Common Core unit).

Previously, I wrote about how I was a little worried about the quality of these compared to the ones I did two years ago when I saw the students twice in a cycle.  For this project, I did the demonstration of how to build the columns at the end of the first class.  The second class they built them, and then the third class they smoothed them out and carved into them.  When they were fired, students took a fourth class to glaze them.

Previously, I allowed two days for construction, a day for refinement, and two days for glazing, which unfortunately would have taken FOREVER with the schedule I had this year.  Despite the time setback, I was pretty impressed with the columns they built!  Most students went for the Ionic column, but there were a few Corinthian types in there too!


Friday, June 20, 2014

2nd Grade: Scratch Art Greek Pottery

It seems like NYS really like the Ancient Greeks!  Maybe it's because we "borrowed" a lot of ideas from them to create our government and architecture.  Either way, the 2nd graders actually have two listening and learning strands based on the Greeks, and the second one was Greek Mythology.

When I returned from my maternity leave, the students were right in the middle of their mythology unit, so I decided to do some scratch art with them.  Second graders always LOVE to do scratch art!  This project took about two days, which is a really great time frame for a project when you only see a class once every six days.

On the first day, we made our scratch boards.  If you haven't seen it already, or you don't know how to make your own scratch board, you can see my tutorial here.

On the second day, we looked at some examples of Greek pots on the smartboard and I passed out a sheet that had different examples of Greek pottery types.  The students had to pick one type to draw.  They then were required to fill their pottery with images from a Greek myth they learned about in class.  Oh yes, they also had to draw a border with a pattern in it before they created their pottery.

I did this project last year with 6th graders, and I have to say that I think the 2nd graders did just as well on it as the 6th graders did.  Knock this off the list of 6th grade projects and move it to 2nd grade!


2nd Grade: Greek Mosaics

Well, I missed "throwback Thursday" but I'll post these today anyhow.  These mosaics were from way back when I had a substitute for my maternity leave.  I asked her to do it in conjunction with the 2nd grade NYS Listening & Learning strand about Ancient Greek civilizations.  This project wasn't exactly executed the way that I would have handled it, but a few of the projects did turn out decent.

I had my substitute use Roylco's Mosaic Squares, something I had purchased a few years back through the Extended Day grant and have never used.  I can't find the link to the sticky ones, but those are actually the ones that were used for this, not the paper squares.  Anyways, I have decided that if I do this project again, I will have the students cut up construction paper into random geometric shapes to fill in their spaces.  I had encouraged her to have the students cut the stickers in half to fit into smaller spaces, but no one did.  In other words, I plan on essentially combining this project with the geometric and organic shape collages that my 2nd graders did the year before.


Wednesday, June 18, 2014

Product Review: Roylco Moving Eyes Portraits

All righty, let's get some blog articles written here!  Now that we are done to the last four full days, two half days, and one 1/4 day of school (I'm not counting or anything...), I finally have more free time on my hands now that my high school students are all taking their NYS Regents exams instead of being in class.

Back in February, a Roylco representative contacted me and asked if I would like to try out a product for free in return for a review of it on my blog.  Of course, I said yes!  Who doesn't like to get free products?  I decided to try their Remarkable Art: Moving Eye Portraits.  Unfortunately, I was unable to incorporate these into any regular classes this year, however I did try them out with some Extended Day kids as an after school project.  These students were mostly 4th and 5th grade, all girls.


The first thing I did was pull out the assortment of faces that come with the kit, and laid them out for the students to pick from.

Next, the students colored the eye balls their color, and we folded them and taped them to the back of the portrait as the directions told us to.

I pulled out all sorts of things for the girls to use.  Scrap paper, gems, pipe cleaners, buttons, etc. etc.

These are their finished products from the project.  The girls that participated did have fun and took a couple extras home.  They wanted to make portraits of their siblings!


So, here is my review.  I'll give you the positives, the negatives, and how I will use the rest of the product I have left next year.

Positives
There is an assortment of faces, both shape-wise and skin color-wise.

On each portrait, the cardboard has lines scored where the nose and mouth should go.  It's good having the face laid out like that for younger students, especially when you're trying to teach them proportions.  This might be a good introduction to self-portraits with younger students...something to get them to see where the nose goes compared to the ears before they try and draw their portrait themselves.

The eyes look cool!  I'm not exactly sure that they looked like they were following us, but having them recessed back a little in the eye sockets makes them look more interesting than drawn on the same surface.  

This kit gives your students the ability to be extremely creative with what they use to create hair and such.  My girls were a little more set on getting them done than really thinking about how they could have been more creative.  Though, I think if you were to incorporate this in class as an actually project, you can do a little more leading up to it to encourage the use of mixed media.

Negatives
The face shapes and colors are limiting.  Even though i was only working with about eight different girls when we tried these out, they were complaining that they couldn't find a head that really looked like theirs.  I almost feel that this project would be a little more beneficial to older students if the faces weren't colored in.  Bring it down to the very bare minimum.

The directions for the eyes are a little unclear.  The way the edges of the eye piece fold they would stick out from the frame if you placed the eyes in such a way as to leave a little gap between the top surface and the eye piece.  I think that's how it has to be put together in order to make it seem like they are "following you", but the folds don't quite match up right to do it properly...at least not without some cutting.

This is definitely something that is meant for younger students.  The age on the package says for 5+ yet the girl on the package looks like she is a 3rd grader.  I don't like to give my older students something that is already "half-done" for them to complete, at least in class.  (After school crafts are a different area where I will sometimes make considerations.) 

Next year, I plan on trying out the leftovers I have with my 1st grade students during a portrait unit.  In the past, I've done Roy G. Biv collages, so i think this might be a cool thing to incorporate with that project, just to see what they do with it.  

You can purchase these kits from eNasco for $18.30 a box, which has 32 portraits total, or directly from their website for $19.99.  For an extra curricular program, craft club or even a regular classroom teacher, this is something I could imagine them purchasing (especially if they aren't confident in the area of arts and crafts!), however I feel like this is not something art teachers would or should spend their budgets on.

If I were ever to do something like this with older students in class, they would not be using this kit.  Instead, they would make their own from scratch.  In all honesty, that's how I tend to use some Roylco products.  For example, my 6th graders designed stamps this year (post coming soon!) for countries they were researching in Social Studies.  Roylco has a stamp kit that you can buy.  I bought one a few years back and instead of having the students draw on the stamps (which is how they are meant to be used), I simply have them use the originals as a pattern to trace their stamp.  That way, they can alter the edging if they choose to.