Showing posts with label photography. Show all posts

Wednesday, October 5, 2016

Photography: Pinhole Cameras & My First Experience Back in the Darkroom since 2006!

This year, I have TWO sections of Photography, and each section has 10 students in it.  Sooooo exciting!  Also exciting, is that the students are pumped to use the darkroom!  Needless to say, it's been about 10 years since I've actually worked in a darkroom at college, so I'm a bit rusty and the chemical mixing, developing times, and in general, the entire process.  The nice thing, is that it's coming back to me slowly, but even nicer, is that I'm feeling like it makes my students feel a bit better about now getting it right the first time, if I'm showing them that learning dark room photography tends to be a lot of trial and error in the beginning.
Lesson #1: Make sure you rinse out the photo chemical storage jugs BEFORE mixing new chemicals.  Any dry developer junks up in the bottle and turns it dark brown.  Lesson learned!

This is also the first class that I am really using a textbook in.  My district purchased me 25 of Davis Productions "Focus on Photography" textbooks, and I'm really loving them!  If you want a quality textbook that you'll actually use, this is it!  Over the end of the last school year, I was starting to plan my curriculum for the school year, knowing that I wanted to start more with digital and move into film photography as students learned more about composition and their photos became less "snap shot-y" and more artistic so as not to waste the dark room materials.  I asked my Davis representative that I met at a NYSATA Conference to send me a copy of their textbook so I could check it out, and I realized that much of my anticipated curriculum, aligned with what was in the textbook, and in the same order it was in the textbook.
Just as a disclosure, I am not being paid by Davis to add this to my blog...this is free advertising for them because I really am loving this textbook!

The first chapter in the textbook gives a little history behind the camera and talks about how a camera works.  Naturally, pin hole cameras come to mind, and so I made my FIRST pin hole camera!  Yep.  I've NEVER made one before. In the textbook, they give you directions to making a pinhole camera using a shoe box that is just for viewing images on a screen inside the camera.  I altered mine, and had the students alter theirs, to have a shutter over the pin hole lens as well as a cover over the viewfinder, to make the camera light tight for putting photo paper inside.

The directions in the textbook have you make a lens with a paper punch.  What I (and my students) discovered through trial and error is that outside, this size lens lets in way too much light for longer exposure times (thus the dark image on the lower right corner).  Inside, this lens size works relatively well.

Next, I made a different size lens, using a larger safety pin to poke a hole through the black paper.  Outside, this size pin hole was perfect when taking a photo in indirect sunlight on a pretty bright day.  Inside, however, in the fluorescent lighting, this size pin hole was not good at all, no matter how long I kept the pin hole open for.
I took a shot of the bench that I had my pin hole camera sitting on so that you can see the view myself and many students used for their cameras.

The Davis textbook also gives you rubrics for their projects, so I used it for this project, but altered it a bit since we technically changed the format of the pin hole camera.  I asked students to turn in 3 developed photographs with their pin hole camera with a brief reflection on the back of each image, telling me how long they kept their shutter open for, the size of their pin hole, and if there was too much or too little light.

We also used these images as a way to talk about the dark room chemicals.  I am currently in the process of trying to figure out a better way to store the chemicals when not in use.  As our chemicals stayed out over time, they didn't work as well, and the students noticed that.  They also got some weird drips and sticky parts on their images, which meant they didn't fully submerge the image in the chemicals fast enough, or they didn't keep them in the stop bath / fixer long enough.  Some have marks because they got stuck together while wet.  Here are some of the cameras and the images students captured, as well as what their cameras look like:

She got the hang of it by her third photo (the middle one).

The bottom image was her last one and it's awesome! Not quite sure how the tape mark got on her image though...I had the students put a tape curl on the back of the photo paper and had them tape it to the screen inside their camera to hold the paper up.  I think she may have taped it behind the screen (which was made out of tracing paper), but I'm not sure.

This student bought a picture box from Walmart.  It made it really easy to make a shutter for her lens using the little metal label holder! Her images turned out awesome, as well, and she learned that she needs to properly rinse the photo in each chemical so as not to get the chemical drips and such.

This student had AMAZING images!  They are literally perfect!  I love how she made her shutter, too.  She attached a popsicle stick to the shutter so she could slide it horizontally instead of vertically.  She is the only student who did that!

Another great turn out of images!

She lost her third image, and even though I asked them to hand in three image, I accepted two as long as they could explain to me why their image was black, white, had drip marks, etc.

This was from one of my exchange students.  We have a bit of a language barrier but he is doing great and understanding things quickly!

All in all, this experience was a really awesome one for learning the dark room through trial and error.  Students really learned how important it was to have a light-tight box and how the tiniest bit of light getting in through a crack could screw up their image.  I assessed students on if their camera was light tight, had a viewfinder with a cover, lens with a cover, and a screen inside, as well as their three images and if they were able to develop at least one good, clear image.  I had students write on the back of their images how long they exposed the camera lens for and then reflect on whether there was too much light, not enough, too small of a pin hole, too big, bad chemicals, etc.

Because of this simple project and experimentation, we have come up with a routine for the darkroom, figuring that we will have to alternate who gets to use the darkroom each class (five in, and five either developing film, taking photographs, or working on digital images on the computer).  I only have three enlargers (two of which work, and one I have to look at and fix), and a shoddy set-up for developing, so not many people can work in there at once.

Tuesday, August 5, 2014

Dabbling in Light Painting

Wow!  I have forgotten what it's like to have a computer!  Let me tell you...the month of July was not friendly to my family....I think we broke a mirror somewhere and didn't know it!  Luckily, Camille is growing like a weed and my hubby still appears to be in the cancer free zone, however a month after he returned to work, the new management that was hired while he was out for his treatments decided that he just wasn't working out anymore anymore with the new direction they are taking the company and released him from his job.  Big :( . 

Meanwhile, we had purchased a pool from Walmart and after setting up and paying the fire company to fill it, a seam burst and we lost all of the water.  Only just this week did we finally get the replacement liner in and the pool filled again.  The A/C went in our new vehicle, I dropped my new Kindle after buying a $60 case for it and shattered the screen (though when I mentioned that I was also an iPhone user after Amazon wanted to charge me $150 for a new Kindle, they were kind enough to send me a new one for free...)...need I go on?  

Needless to say, I'm very sorry that I haven't been able to post for a while!  I have SO MUCH to share...not only do I still have posts from the end of the last school year to share, but I also have projects from the extended day program that I worked in the month of July.

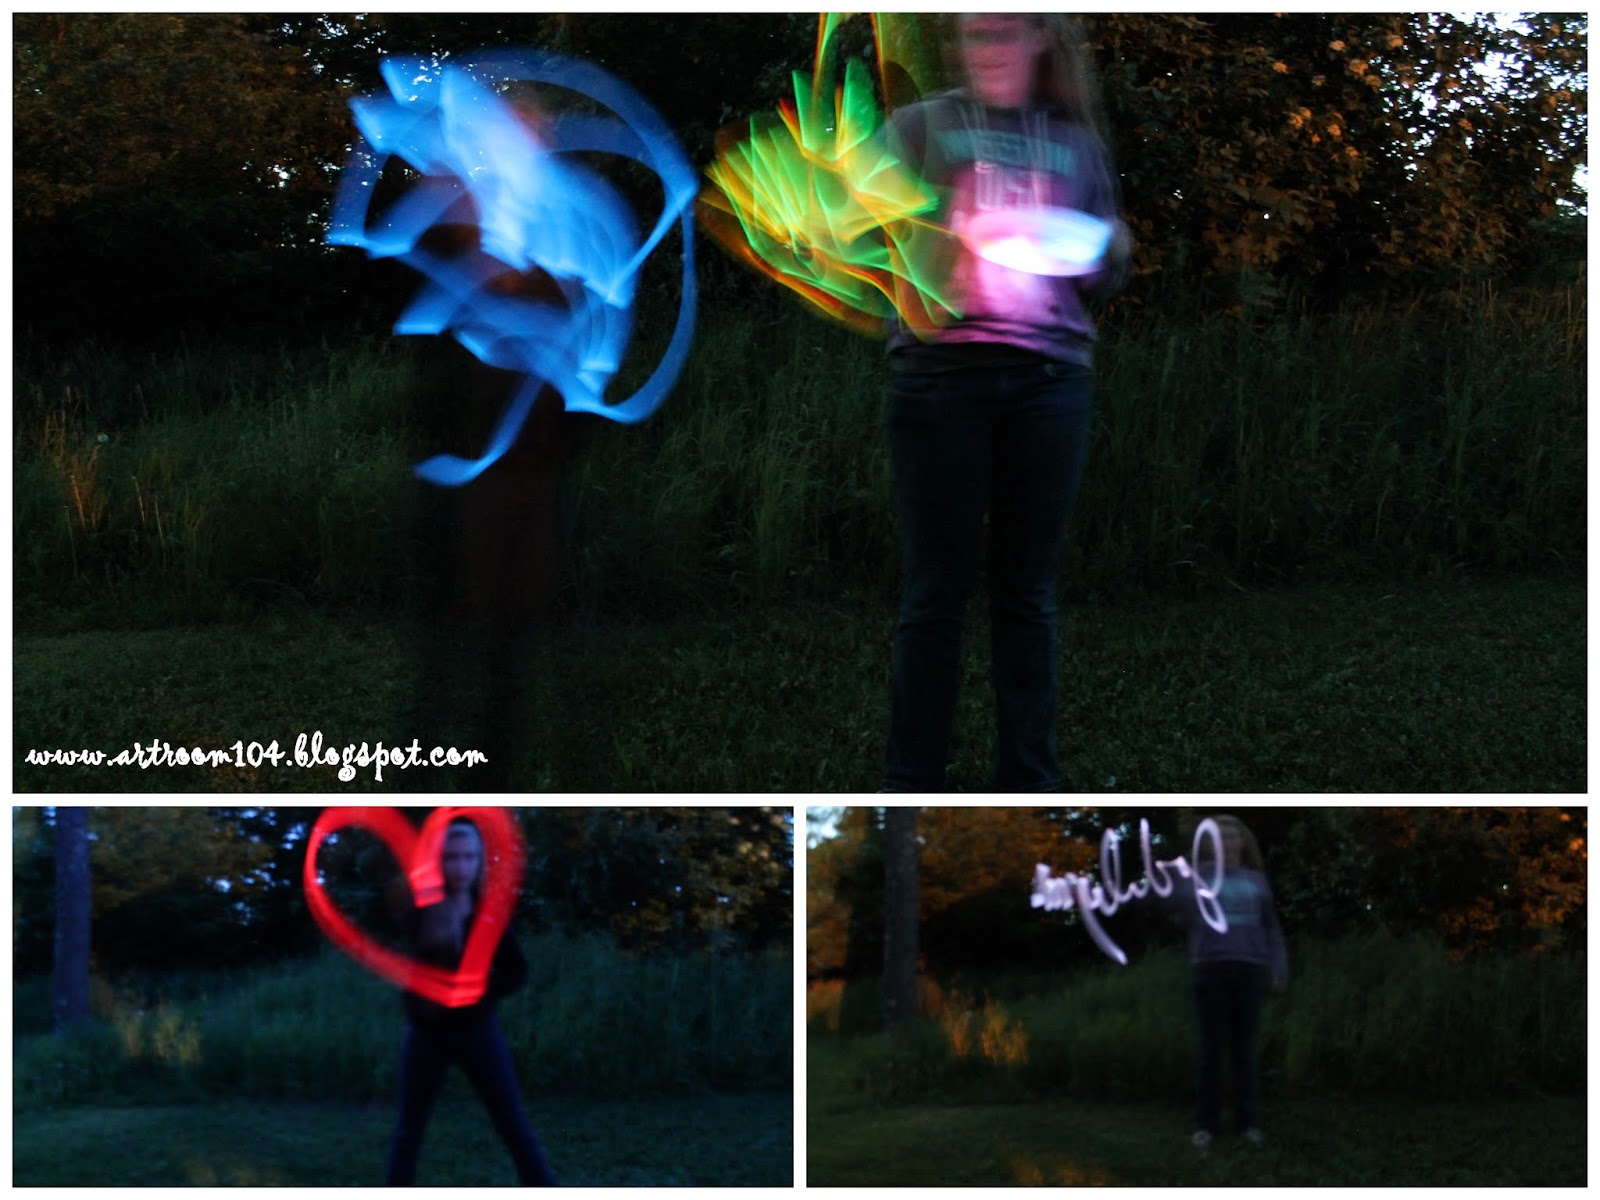
First post....light painting!  After my elective class finished their Modern Mona Lisa paintings, we didn't really have much time to do anything super in depth, so I turned to light painting.  First, we experimented with glow sticks in the dark room for a few days...

These are glow sticks attached to a fan.  The students took the wire encasement off the blades, taped the glow sticks on, and then let 'er spin!  The picture in the top left is when the sticks were put in rainbow order of course (pink, yellow, green, blue and purple).

Next, we tried doing some drawing with the glow sticks.  Despite the darkroom being pitch black, the glow sticks still lit the room up enough to show the students a bit.  We finally got smart enough to hide the glow sticks when a color wasn't being used.
The landscape light painting took some experimentation to get it just right.  They tried doing it all at once, doing the sky first, then last, then first again...The order we did things for the final, "good" landscape, which is the bigger picture in the collage, was the green grass, blue sky, yellow sun, the flower and then the butterfly.  All the students stood in a group in the same spot and one person at a time did their color.  It was easier to get things lined up with them all standing together.

Remember to do your letters backwards if you're using glow sticks, so that they can be read in the picture!

For our last bit of experimentation, we got permission from the superintendent to come back on school grounds to do this at night outside.  We got to school around 9:00, but couldn't really do much of this until about 9:30.  For these photos, I had light-up Frisbees that the ladies used.
These two photos were of the girls tossing the Frisbees back and forth, and running through the playground.  I really like the playground ones!  When they got to the end of the playground, the took the Frisbee and tossed it towards the camera.

And more glow stick fun...In the bottom right picture, one student wrote her name but it's backwards to the viewer because she wrote it the write way from how she was standing.

I really enjoyed fooling around with these.  I used my tripod and my DSLR camera.  I put it on manual, opened up the shutter for anywhere from 10 seconds to 25 seconds.  I also had to turn off the automatic focus.  Even though the night pictures outside look like it was dusk, it was actually very dark outside.

It is my goal this year to get multiple colored laser pointers.  I have a red one, but I want to see if I can find laser pointers in an assortment of colors.  I think there is a lot more that could be done inside in the darkroom on the wall with the laser pointers.

Sunday, January 19, 2014

Elective: Ben Heine Inspired Pencil vs. Camera

Hi everyone!  I'm baack! ;)  This week was my first week back to school after my maternity leave...and it was rough!  It was hard leaving my little one at daycare the first day...but I have to admit that my busy day at school every day kept my mind off of that.  It was hard also because my little one has been diagnosed with reflux and it affects her the worst at night.  This week I was lucky to get 3-4 hours of sleep every night.  And of course, she was happy during the day at day care and crabby at home for mommy and daddy!  We're now trying a second medicine and so far it seems to be kicking it and making her feel better...last night she actually slept for two four-hour stretches!  On top of everything else, I was very sick Friday from lack of sleep and such.  I had a fever and a cranky baby!  Thank goodness for my hubby and friends who babysat her yesterday so I could get some much needed sleep!

When I got back to school on Monday, for the most part I was pleased with what was done on my leave.  For the most part, projects were completed at the bare minimum of what I would expect and nothing much about my classrooms were changed.  So, here's my first "post-pregnancy" blog post!

This particular project is what my elective group was working on when I left.  I had seen various examples of Ben Heine's "Pencil vs. Camera" series on Pinterest and loved the idea of using him as a starting point for a project.  So, my elective class was given the assignment to take a variety of photographs as homework.  In class, they used Picassa to edit them and then finally, they had to add a drawing to the photo that changed it.  I also taught/retaught students how to mat their artwork.  Here are some of the finished products!


Saturday, February 9, 2013

It's a winter wonderland outside!

By no means is this a post about how to take photos in the snow...this was my experimentation at it!  If you're a photo person, please feel free to give me your input!

I was a little afraid that I would wake up this morning to find that ALL the snow we had dumped on us would be melted (as happened during the last "snow storm") but I was pleasantly surprised to find that it's all still there!  I can't really give you a definite on how much snow really fell on us, I would say at least a foot, but there are parts that are past my waist and areas that you can still see ground.  It was pretty windy yesterday so there's lots of drifts!

Anyways, I decided to go out and experiment with my camera again.  It's slightly cloudy out, but the sun is shining through.  Before I headed out, I figured I should look up the best way to photograph snow.  So, I googled "how to photograph snow" and I found a Light Stalking post from 2010 that gave some pointers.  My only lens is a 55mm so I obviously couldn't achieve the exact affects the photographs have on this link, nor was I shooting under the same conditions.

He suggested taking photos with a setting of f/4, which are these two photos below.  Assuming I have the correct photography lingo down (please correct me if I'm wrong, I've never seemed to be able to get the correct vocabulary down for manual photography!), this would be too much exposure to light.


So, I adjusted to f/12, and that seemed to work a little better.  I can't quite remember what my shutter speed was, I adjusted it a few times just playing around, but I kept it at a quick shutter speed, around 1/1000. (Photo followers, should I have upped that a little more?  Some of these photos look cool but some probably could have used a little more contrast...)


Gorgeous sky!

Our car is buried...on one side!  The other side looks like it's been plowed! lol


I LOVE these photos of Daphne!  My shoveled deck gives the appearance of an edited, rustic photo! ;)  


Now I need to figure out the right setting for taking photos of my white dog against white snow!  I was trying to get a photo of all the frozen snow on her fur, but I may need that 300mm lens to achieve that... 


It was only after I came inside that I remembered about the little -/+ dial on my camera where I can change the amount of light that is let inside the lens...

Saturday, September 15, 2012

Anti-Bullying Self-Portraits!

I may not have mentioned it previously, but I am not considered a "full time" art teacher...I am 84%!  That means I go into school 5 out 6 six days in the 6 day cycle.  All of the other teachers are jealous of my illustrious "day 6" that I get to stay home (unless I tell the district that I can substitute teach that day, make copies, etc.).  So, this last Thursday I was able to stay home and get some work done around the house.  Guess what next week will be for me??? A 3-day weekend already!  In all honesty, I do enjoy having day 6 off, but I would really enjoy to become full time too!  Either way, I'm just happy to have a job teaching art in NYS!

As for what we've been doing in class, the Elementary counselor has been team teaching with me to present and kick off the anti-bullying campaign our school does every year with OLWEUS.  We are doing a little variety of projects. 

First, with K-2, we are talking about differences.  First she had them pick a single crayon out of my massive crayon box bin and they talked about how the crayons were similar and different.  Then they compared that to people.  Bless his little heart, one little boy said, "Well, um, you can use people like a pencil maybe and we can turn them upside down and use their hair to erase on their paper?  That could be how people can be like crayons!"  He said it with the utmost sincerity...those are the moments that keep me teaching elementary art!

Anyways, after the crayon talk, we read the poem "The Crayon Box That Talked" and then let the kids watch the video.  For the art project portion, each student received one crayon from a crayon box to draw a self-portrait with.  Let me just tell you, I was very impressed with some of the self-portraits one of my kinder classes drew!  I gave them a mirror to observe their facial features and I was SHOCKED at the number of students who drew their eye lashes, freckles, eye brows, etc. WITHOUT any prompting!  Not what I expected!  Definitely have some advanced little artists this year in kindergarten, I can't wait to see this group grow up and progress through art!


After all of the students create their portraits, we will display them in the order of the rainbow on our anti-bullying bulletin board in school!

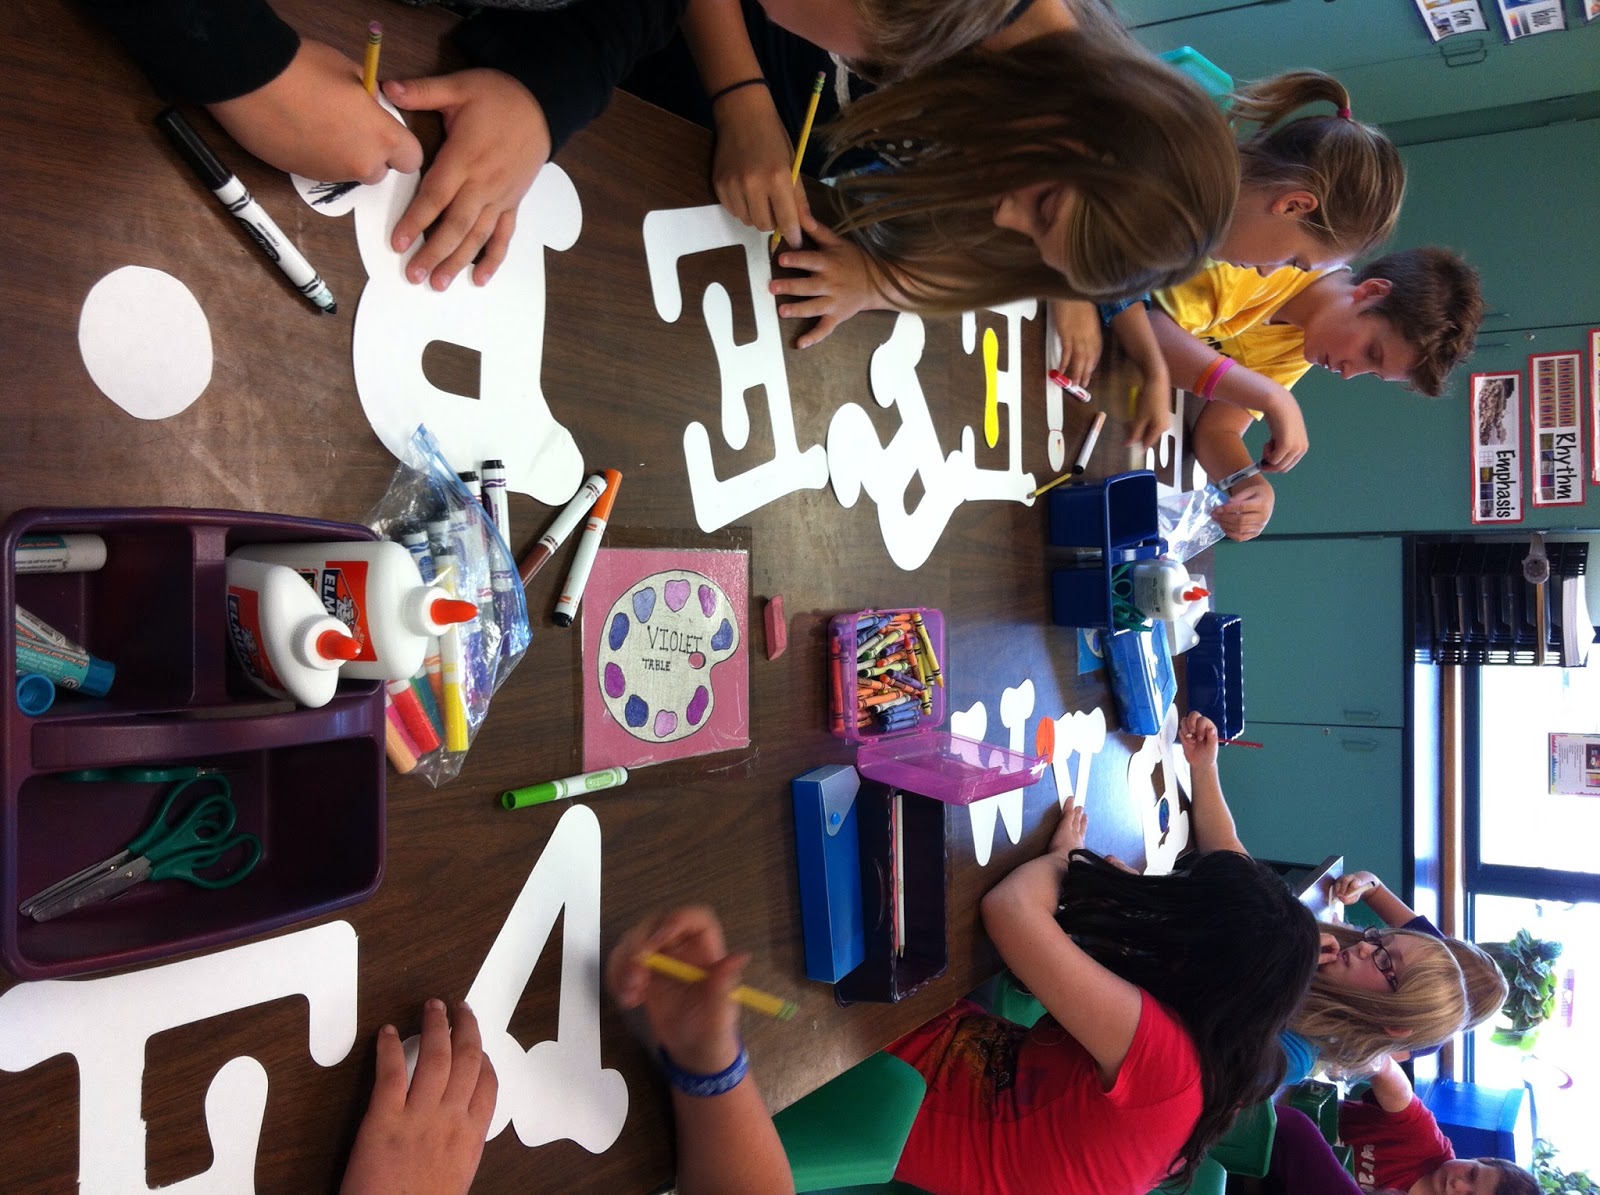
So the other project we are working on currently is with 5th and 6th grade.  They are pretty similar.  The 5th graders broke into groups and brainstormed anti-bullying slogans.  After choosing their best one, they are creating photo alphabets to piece their slogans together to hang in the hall.  This is the FIRST time I am doing this with younger kids, so we will see how this turns out!  This weekend it's my homework to make sure all the pictures they took will work and to get them printed out in black and white so they can trim them and mount them neatly.  This particular group decided to all use art supplies to create their letters, which was a little disappointing.  My other group of 5th graders, however, is going to be a little more creative.  About half of them want to go outside to find letters and the others will be using their bodies/hands to create their letters. Once completed, these slogans will line the hallways at school...we will have 12 different slogans to display!


As for the 6th graders, they also brainstormed slogans that incorperated our school name/mascot into them.  One group decided on, "Bullies beware...the cougars are everywhere!"  Then, I had all the letters of the slogan cut out in large letters using a Cricut.  Then, each student gets 2 letters to decorate with an anti-bullying theme.  Some of them are doing a really nice job being creative with the theme, but others are sticking to the same old peace signs, hearts, etc.  Once finished, the two slogans will be displayed for the school year at the prominent school entrances.  More pictures to come after the slogans are complete!