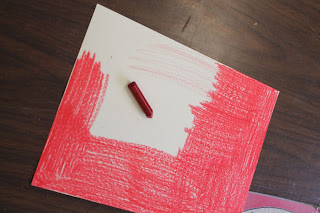
To make the scratch board paint, I usually just squeeze 1-2 tablespoons of dish soap into an almost full container of paint. I'm sure there is an actual recipe out there somewhere, but I figure once the paint starts smelling like the dish soap, there's probably enough in it to make a difference. You'll notice that the paint will be a little bubblier from the soap once you shake it up and a little shinier than normal during application.
Next, paint over the crayon with the scratch board paint! I like using the sponge brushes. I usually have the kids do two coats. Be sure to use long, even strokes across the paper. If your paint ends up being too think in spots, it will end up being difficult to scratch precise details because the paint will want to chip off. Paint a single layer, let dry, and then paint another. Today I had the kids take their papers to the heater and hold it upside down over the air to dry their layers faster. Everyone was able to prepare their scratch boards in one class today.
These scratch boards are for the 6th grade Greek unit. Students are currently learning about the evolution of Greek pottery, starting with Minoans and the geometric style. They were asked to choose a type of Greek pot to represent in scratch art, thus the black and red colors. Some students are doing red crayon with black paint while others are doing black crayons with the red paint to replicate the idea of red-figure vs. black-figure pottery.
The Egyptian project used up A LOT more clay than planned...so I don't think I'll be able to do as many clay projects with the 6th graders as planned. I still need to do a clay project with my Kinders, 2nd graders, and 3rd graders. Currently, I'm working hard on doing some reclaim of clay so that I can hopefully do more clay with 6th grade again!
--------------------------------------------------------------------------------------------------
Here are some of the past scratch art projects that I've done with my kids:
These were scratch art skeletons I did with 5th grade my first year of teaching. We used store bought scratch board. Some of the students did a decent job creating a good composition, but others wasted the expensive board. This is the project that opened me up to making my own scratch boards!
This was my first home-made scratch art project. I did this with 1st graders, also during my first year of teaching. We did under water scenes, so I asked them to choose bright colored crayons to color their tag board with. We used black tempera. You can see on some of the photos where students didn't have two solid coats of paint. If you don't do two good coats, you'll be able to see the crayon through the paint.
I did this project last year with 2nd graders. We talked about the Arctic and the types of animals that live there. We colored our tag board with blues and greens before painting over with white tempera paint.


Nice project! I really like the white ones! ( the black are nice too) :)
ReplyDeleteLOVE the Greek pottery idea! I'm going to have to try that ASAP. And I never thought to try the scratch art with any color other than black--silly me! I've done a Ukrainian Pysanky (Easter eggs) project with fourth grade that they really love, but we've always used black paint. Might have to try it with a different colored paint. Thanks!
ReplyDeleteAlso, I like your new blog design! :)
Thanks! I'm trying to make my blog more me and my classroom...eventually I might get around to designing an actual logo. I don't have Photoshop so it took me almost two hours to get pictures pasted together in Paint to start my photo collage at the top!
DeleteI did this with acrylic paint and no dish soap over the oil pastels and it worked beautifully!
ReplyDeleteI'd like to try this out for an ESL lesson. What kind of tools did you use for the homemade scratch boards? Will toothpicks work, or is there something better to use? Also, does it chip into clumps when you use a tool on the board, or does it come off smoothly? Either way, it looks very fun!
ReplyDeleteThanks for sharing this information. it is a use able information. this is a nice and good blog.
ReplyDeleteAll kinds of Colored Paper and Boards
Great This is awesome. Will be going to much use!!!
ReplyDeleteGreat This is awesome. Will be going to much use!!!
ReplyDeleteI never had seen this type of blogs...Which contain this types of photographs..I really enjoyed reading this blog.. world travel scratch map
ReplyDeleteVery interesting blog to read. Bookmarking your website to check other stuff in spare times. Thanks.
ReplyDeleteScratch Off Map